


DUCO Core Vision Plugin User Guide#
Vision Plugin#
Open the DUCO CORE page and click the Vision plugin button at the bottom left corner, as shown in the image below
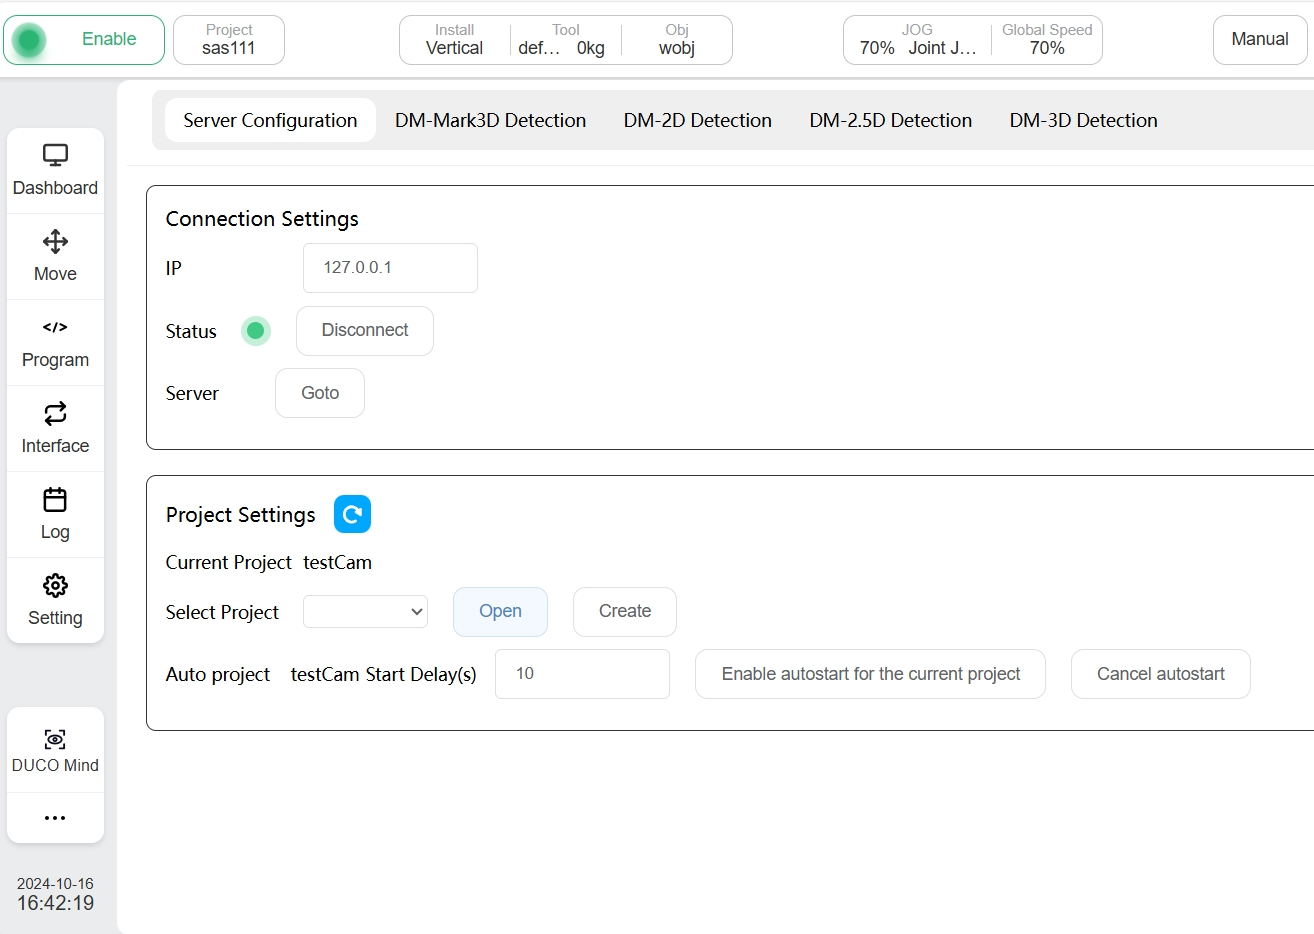
Enter the server IP in the Server Configuration interface shown above and click connect. When the Connect button changes to Disconnect, it indicates that the server connection is successful. At this point, clicking the Go To button will open the DUCO MIND interface in your browser.
Packages#
General Packages#
After opening or creating a program in the DUCO CORE interface, click Instruction->Extension, select VisionFlow and add it to the program, as shown in the following image
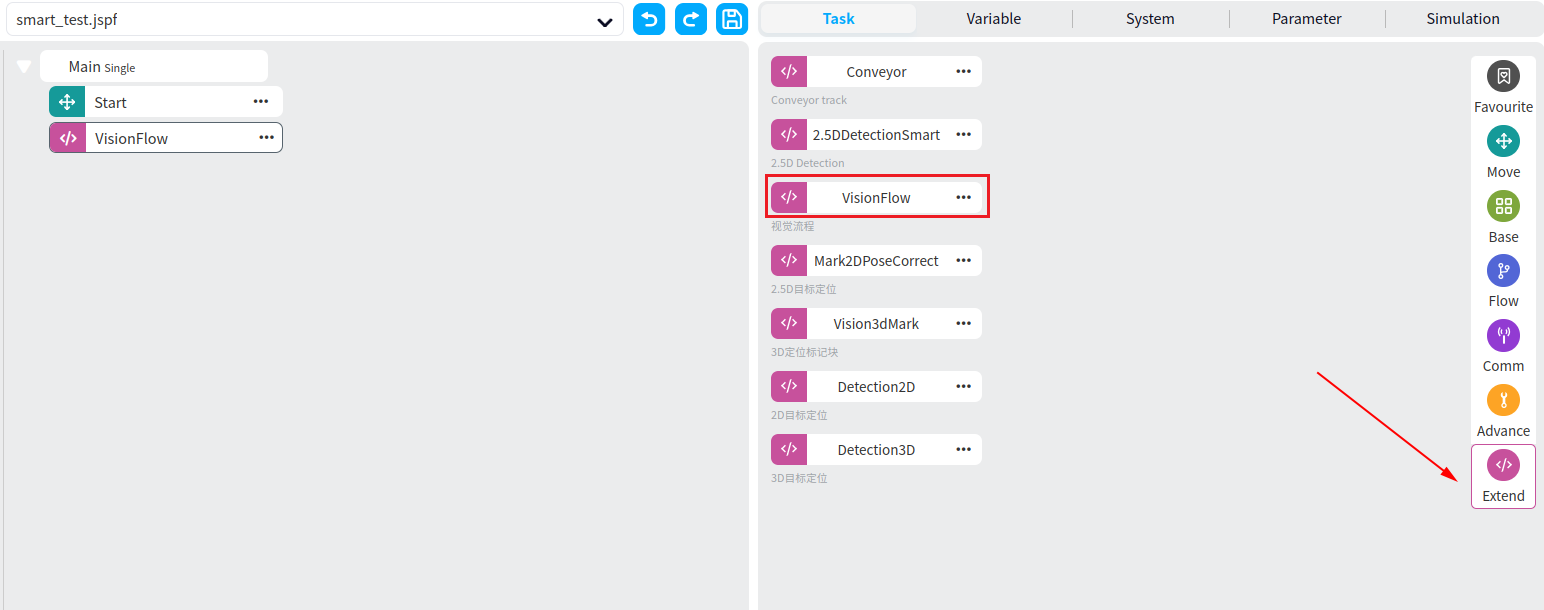
In the above interface, click Parameters or double-click VisionFlow to jump to the parameter settings interface, as shown in the following image
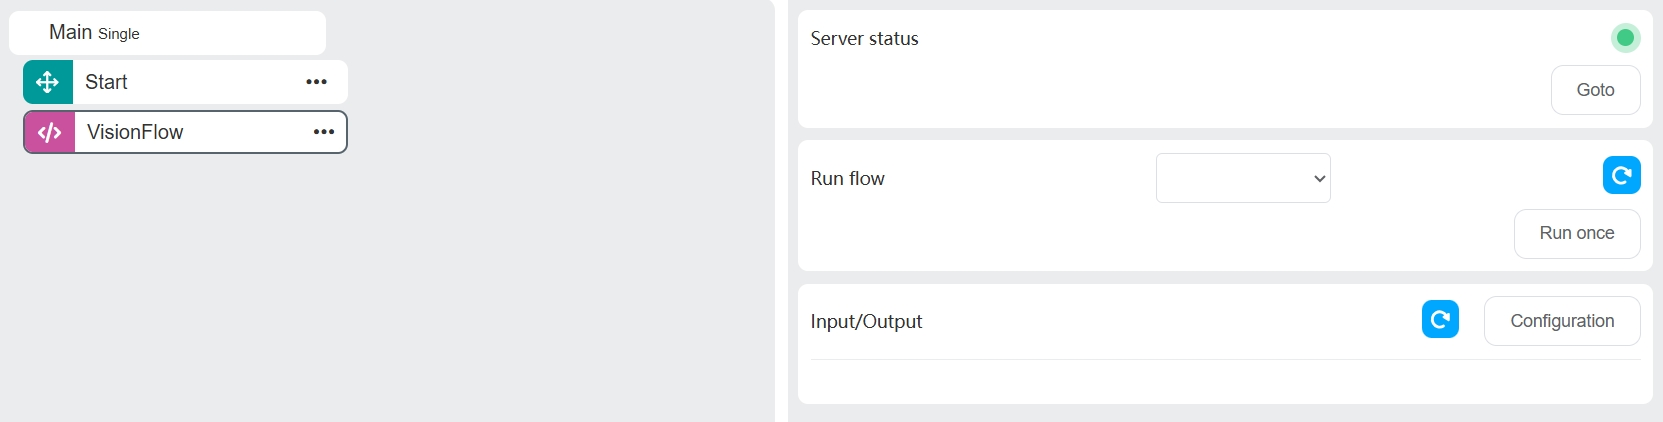
In the above interface:
If the button behind Server Connection Status is green, it means the server is connected. At this time, click the Go to button to jump to the DUCO MIND interface.
In Run Process, you can select any process from the currently opened projects in DUCOMIND. Click the refresh button to refresh, and click the Run Once button to run the selected process once.
The input and output variables in Variable IO correspond to the input and output variables of the processes in DUCOMIND. At this time, new response-type variables need to be created for matching.
Tip
When switching from the DUCOCORE interface to a new DUCOMIND interface, it is recommended to manually close the previous DUCOMIND interface to prevent errors.
DM-Mark3D Block Positioning Package#
After opening the Vision Plugin in the DUCO CORE interface, click 3D Mark Block Positioning Package, as shown in the following image
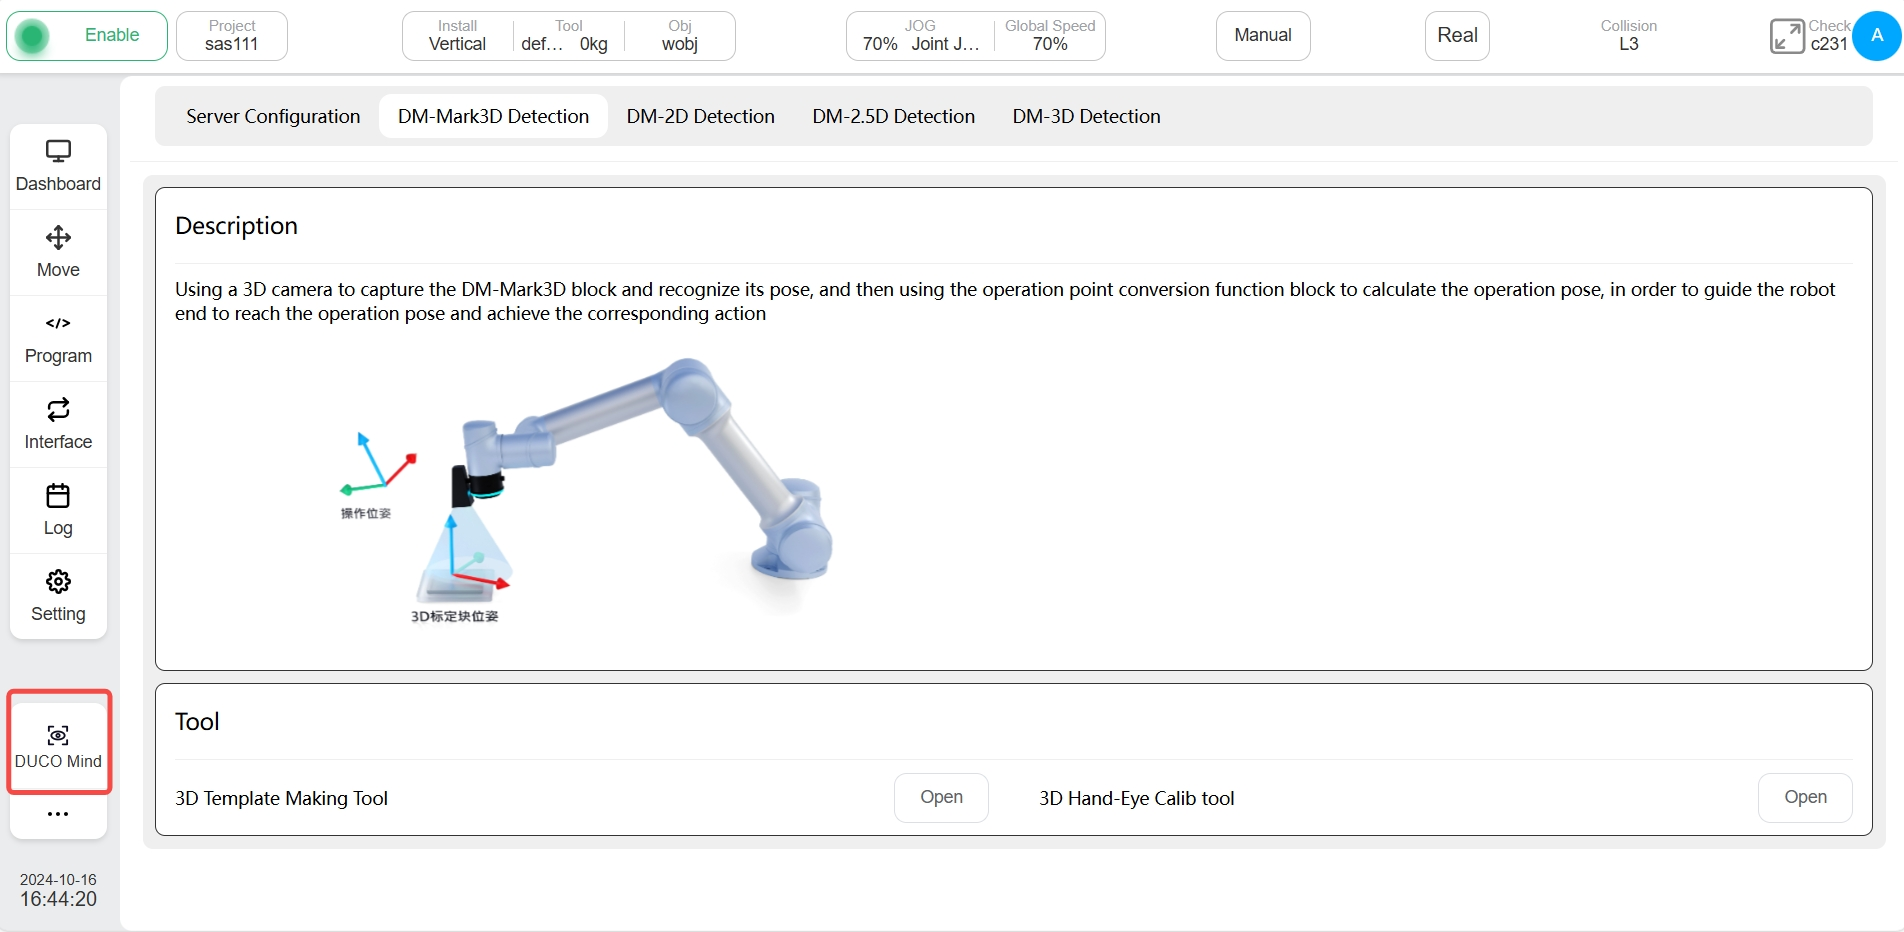
In the above interface, there are buttons to open the 3D Template Creation Tool and the 3D Hand-Eye Calibration Tool. Clicking these buttons will open the corresponding tool interfaces in DUCOMIND.
After opening or creating a new program in the DUCO CORE interface, click Instruction->Extension, select Vision3dMark and add it to the program, as shown in the following image
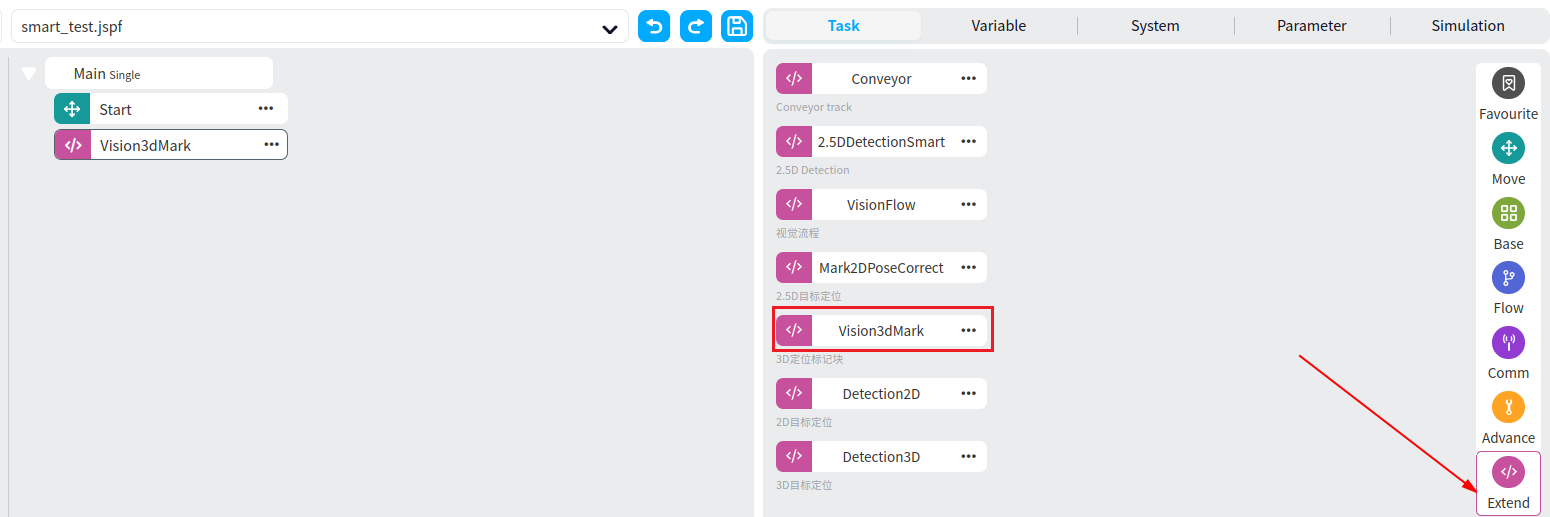
In the above interface, click Parameters or double-click Vision3dMark to jump to the parameter setting interface, as shown in the following image
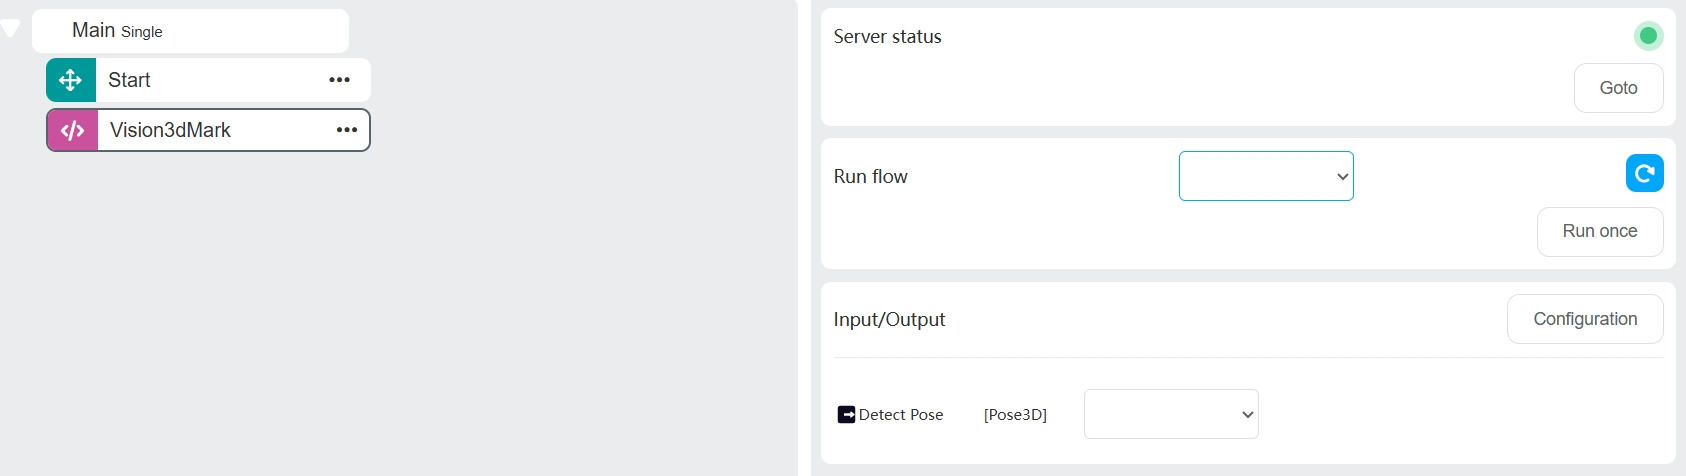
In the above interface:
If the button behind Server Connection Status is green, it means the server is connected. At this time, click the Go to button to jump to the DUCO MIND interface.
In Run Process, only the 3D Mark Block Positioning process in DUCO MIND can be selected. This process is imported into DUCO MIND through Preset Template Import.
The output variables in Variable IO correspond to the output variables of the 3D Mark Block Positioning process in DUCO MIND. At this time, a new Pose3D type variable needs to be created to receive it.
DM-Mark2D Pose Correction Package#
After opening the Vision Plugin in the DUCO CORE interface, click DM-Mark2D Pose Correction Package, as shown in the following image
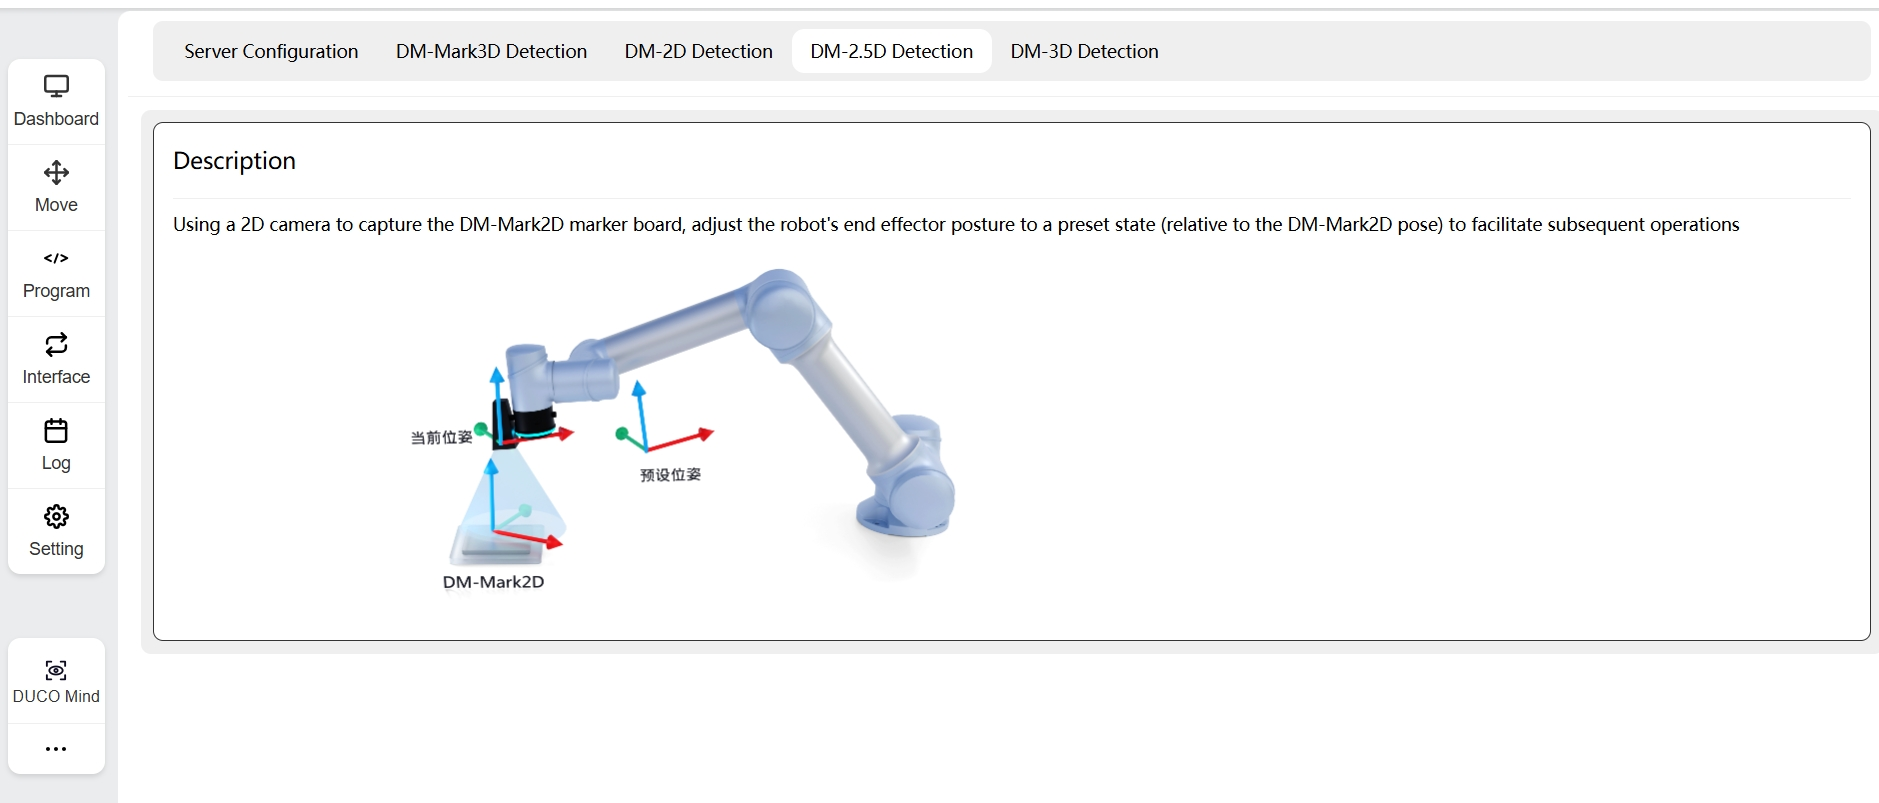
After opening or creating a new program in the DUCO CORE interface, click Instruction->Extension, select Mark2DPoseCorrect and add it to the program, as shown in the following image
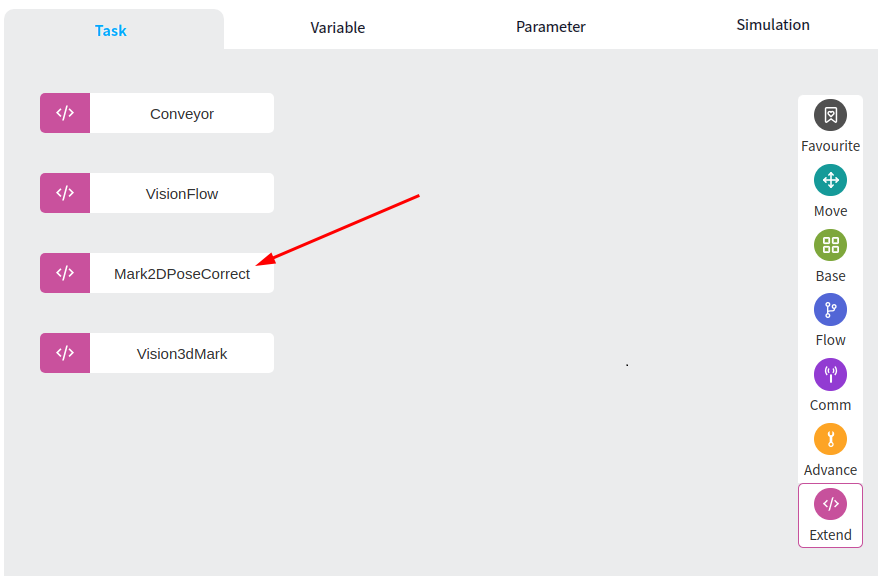
In the above interface, click Parameters or double-click Mark2DPoseCorrect to jump to the parameter settings interface, as shown in the following image
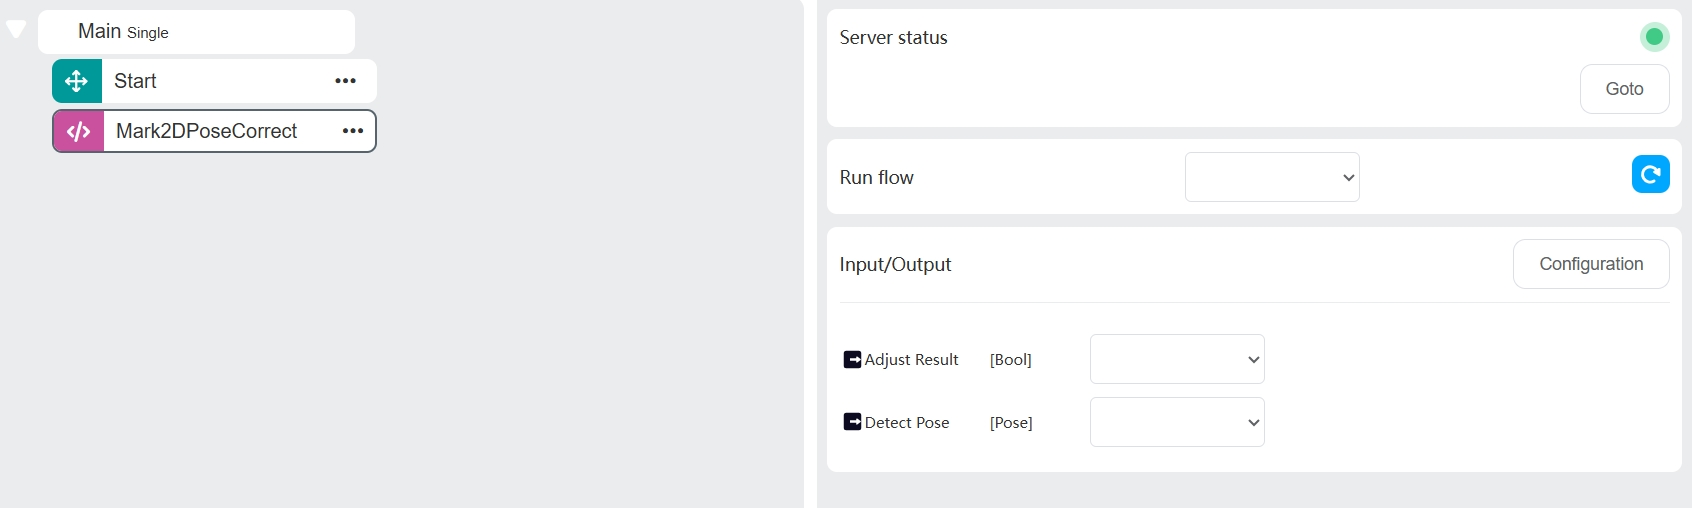
In the above interface:
If the button behind Server Connection Status is green, it means the server is connected. At this time, click the Go to button to jump to the DUCO MIND interface.
The output variables in Variable IO correspond to the output variables in the Smart Processes of DUCO MIND. At this time, a new Pose3D type variable and a Bool type variable need to be created to receive them.