Basic Configuration#
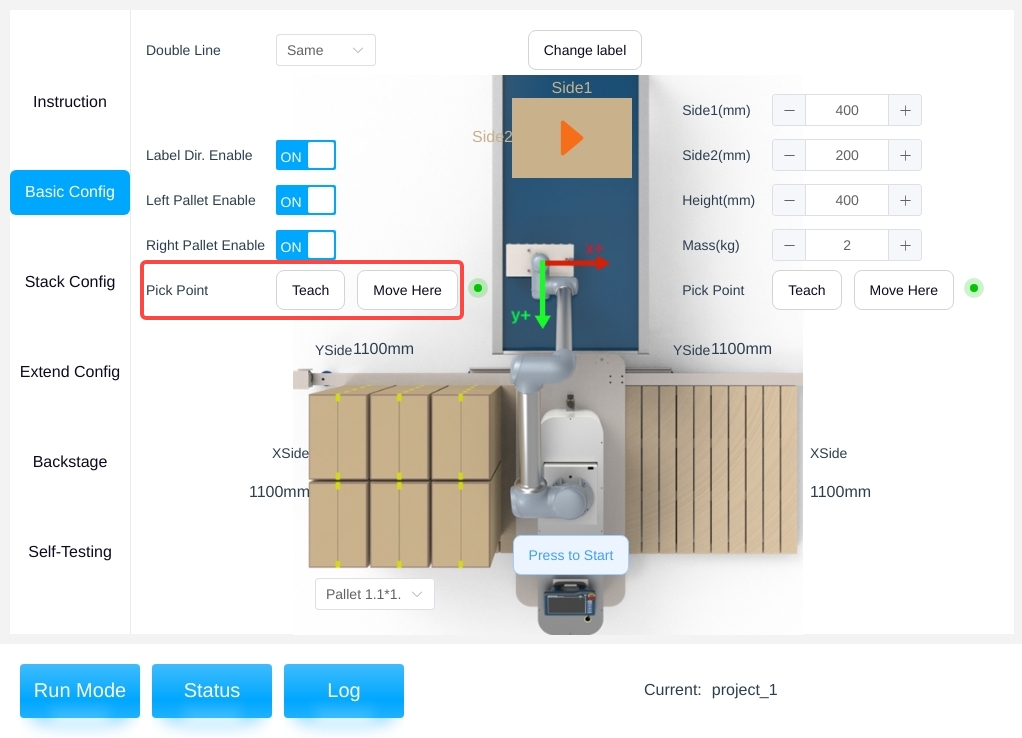
On the Production Recipe Management page, after selecting a production recipe and opening the production recipe, you will enter the Configuration Mode Operation Description sub-page, as shown in the following figure.
Read these instructions and then proceed to the Basic Configuration page.
Box Parameter Configuration#
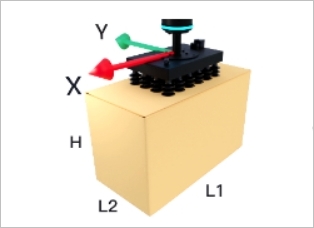
The box size size and box mass are adjusted according to the actual situation, where the side 1, side 2, and height of the box are along the X-axis, Y-axis, and Z-axis of the TCP coordinates, respectively, as shown below.

Note
Tips: The box parameter must be set, otherwise an error will be reported when running!
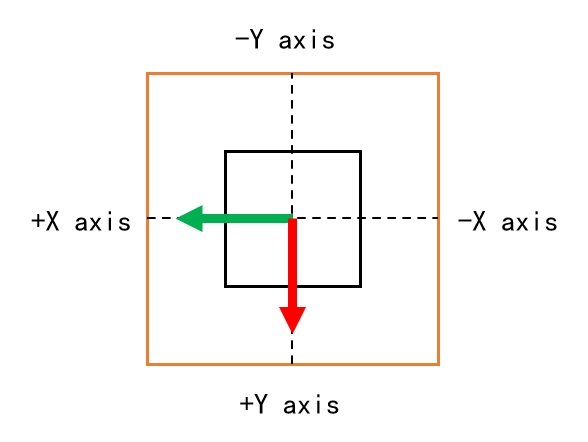
The box front (labeling orientation) is relevant for later stack configurations. By default, the labeling direction of the box is pointing to the positive direction of X-axis based on the end TCP coordinates. To accurately control the orientation of the box (pattern side or label side), you need to turn on the Labeling Orientation Enable switch, and click the Labeling Orientation button to switch the front orientation of the box counterclockwise (based on the positive or negative direction of X and Y-axis of end TCP coordinate system) as shown in the figure below. (based on the positive and negative X and Y axes of the end TCP coordinate system) as shown in the figure below, and ensure the consistency and orthogonality of the box orientation.

As shown in the figure below, please select the front orientation of the box correctly according to the TCP coordinate system below.
The suction cup tool coordinate system is orthogonal to the box, as shown below.
Pickup Point Configuration#
The pickup point is the point at which the end of the robot sucks up the box, as shown below.
Note
Note: The pickup point is not set by the system, you need to set it by yourself, otherwise it will report an error when running!
Select “Pickup Point” → “Teach” to enter the teach pop-up window to adjust the end pickup point of the robot. Manual teaching is performed in the pop-up window, where the first column is the joint point movement, the second column is the end six-degree-of-freedom point movement, and the third column is the elevation axis point movement, as shown in the figure below.

Click “Memorize Current Point” to exit the demonstration window after the demonstration is completed.
Note
- Tips:
The slider allows you to adjust the running speed of the robot during the teaching process;
By clicking “Hold to level”, the attitude parameters RX and RY of the robot end can be adjusted to the level of the end;
Clicking on “Zero Hold” will return the elevation axis position to zero;
Click “Remember current point” to make this position adjustment effective;
The subsequent teaching process can be referred to here and will not be repeated in the following article.
Click on “Move to this point” to move the end of the robot to the position of the pick point you just taught.
Note
- Tips:
Pressing and holding “Move to this point” will cause the robot to continue moving, releasing it will abort it, and pressing and
holding will not work once it reaches the preset point, so please be aware of the risk of collision and interference during the movement process, which will not be repeated later.
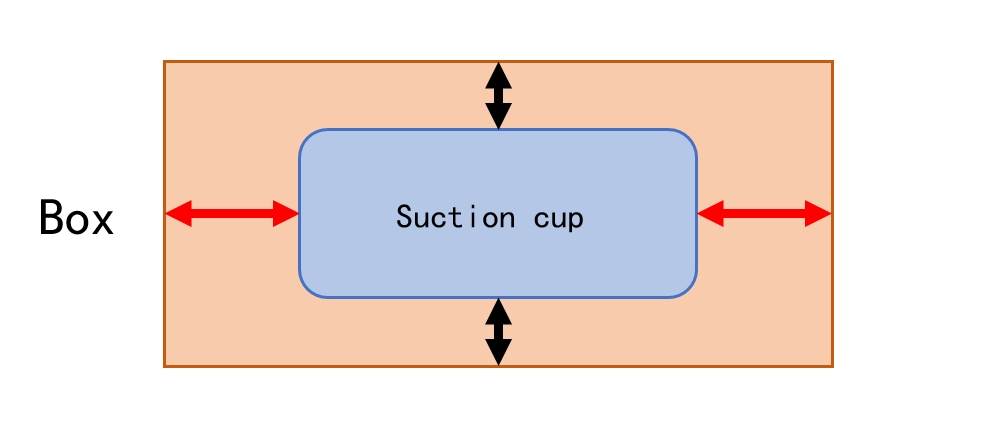
When teaching the pickup point, please note that the position of the placed suction cups should make the distance from the suction cups to the upper and lower (left and right) sides of the box the same, as shown in the figure below.
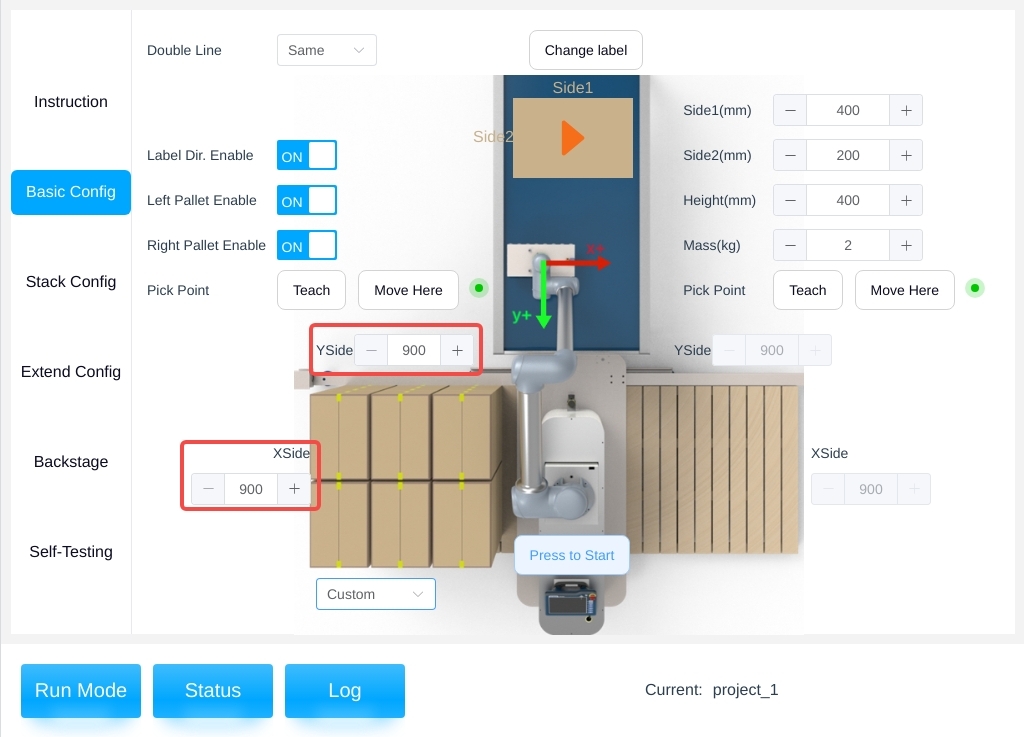
Pallet Parameter Configuration#
Select “ON/OFF” to decide whether the left/right pallet is enabled or not. If it is not enabled, no box will be placed on this pallet during palletizing, as shown in the figure below.

The tray size size options are available in 4 options, 3 of which are preset size size options as shown below.
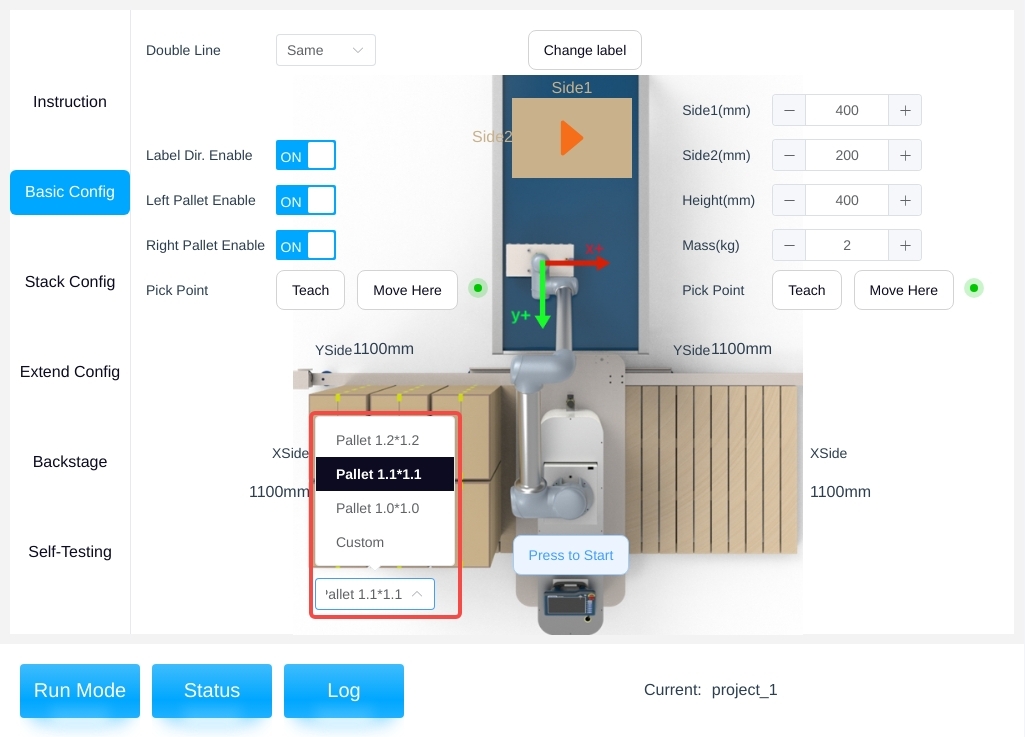
Users can select the customization option to adjust the tray size parameters according to the actual situation, X side, Y side for the tray side length, as shown in the figure below.