Stack Configuration#
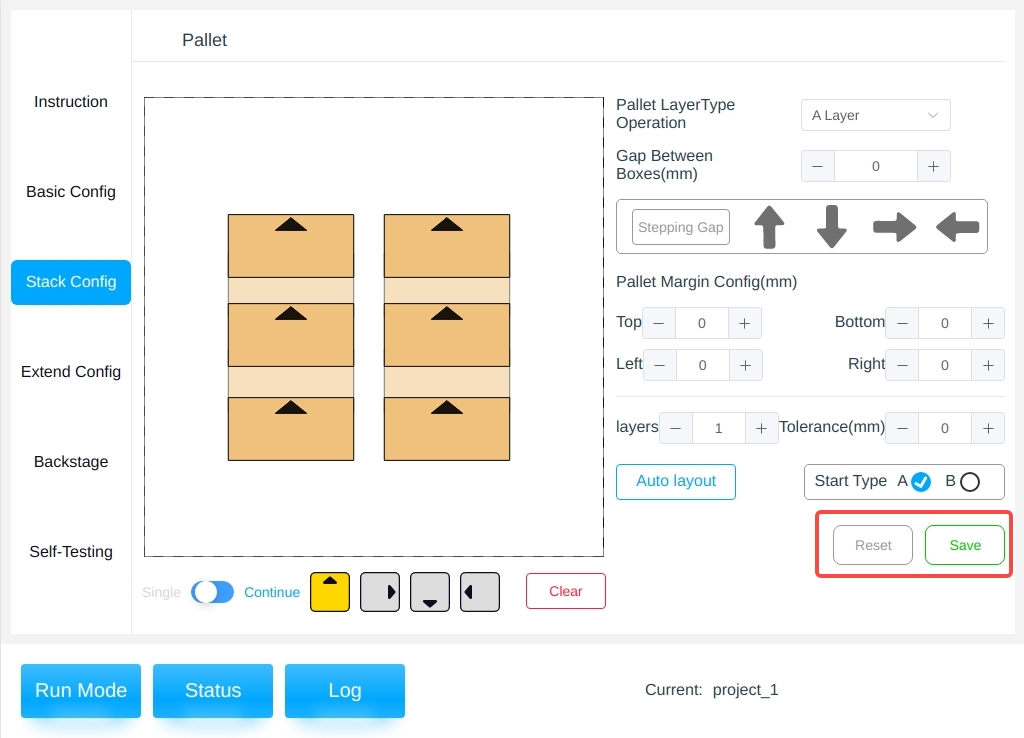
After configuring the pallet parameters and box parameters in the Basic Configuration page, you can enter the Pallet Configuration page for subsequent operations, as shown in the following figure.

The stack configuration page is divided into left and right areas, with the left area showing the results of the presentation of the stacks and the right area configuring the parameters of the stacks.
Note
Tips: Running when the stack type is not configured will report an error!
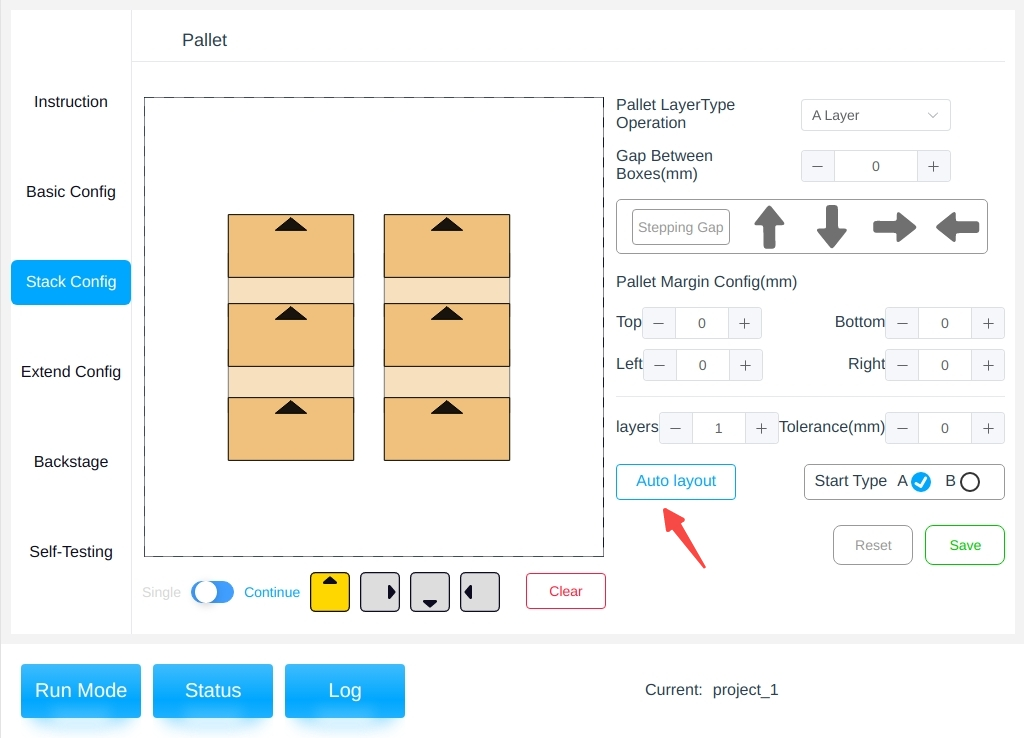
Automatic Palletizing#
The Auto Palletize page is accessed by clicking on the “Auto Palletize” button, as shown below.
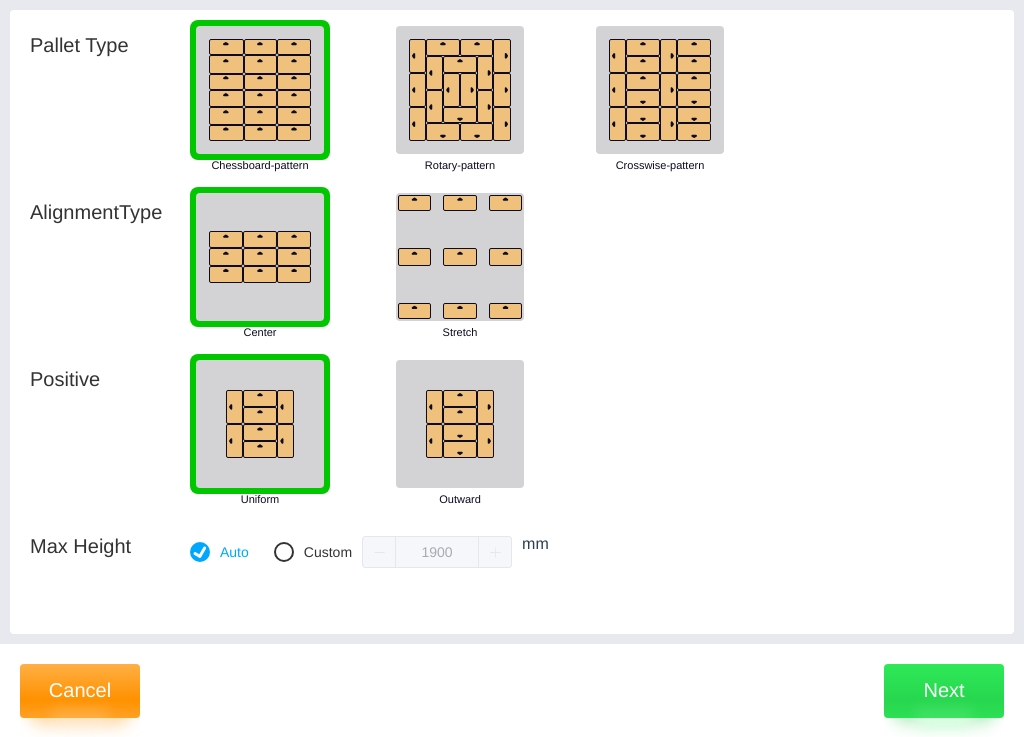
After clicking on “Automatic Palletizing”, you can select the type of pallet, the alignment mode, the orientation of the front side and the maximum pallet height according to the actual situation. Among them, the maximum stack height can be selected from “Auto” or “Custom” modes.
Among the types of pallets.
Chessboard type: all boxes are placed horizontally or vertically;
Swinging type: the circle as a unit, swinging type placement of the box;
Vertical and horizontal: the boxes are placed vertically and horizontally in columns.
In alignment mode
Centered: Gather the boxes together and place them in the center;
Stretch: place the boxes spread out with a certain distance between them.
In front orientation
Consistent: place the box labels in a consistent front orientation, in columns;
Outward: in laps, the box labels are placed outward in the frontal direction.
In the setting of the maximum stack height
Automatic: i.e. the reachability check starts from the highest height and knows that all boxes are reachable;
Custom: starts from the given height downwards to find the maximum height that meets the conditions.
Note
Tips:
Automatic nesting uses the stack type selected for the base configuration as the configuration template,
and B-stacks are aligned 90 degrees clockwise of A-stacks;
The outer contours of stacks A and B are aligned.
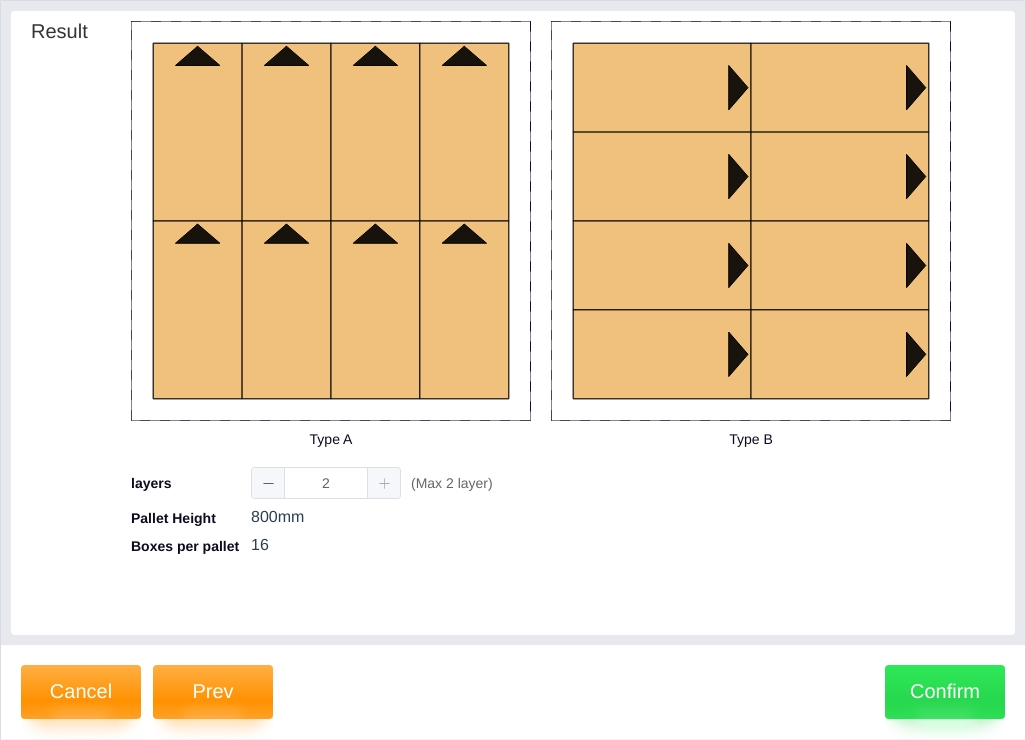
Clicking on “Next” displays the generated result of the automatic nesting, with the number of layers, the maximum possible stack height and the number of boxes per stack displayed below.
In the generated result
Number of layers: the number of layers that can be reached based on automatic or customized heights calculated automatically;
Stack height: the corresponding stack height is automatically updated when the number of layers is modified;
Number of boxes: the number of boxes is automatically updated when the number of layers is modified.
The figure shows the generation of automatic palletizing:
Parameter Setting Area#
Storey、Interlayer Tolerance: The number of layers and interlayer tolerances can be adjusted according to the actual situation;

Note
Tips:
The “Interlayer Tolerance” is a certain height reserved for the box when the robot end is placed on the box, a positive value is a clearance, a negative value will be pressed, please fine-tune according to the actual situation. The figure below shows the schematic diagram for a positive interlayer tolerance.

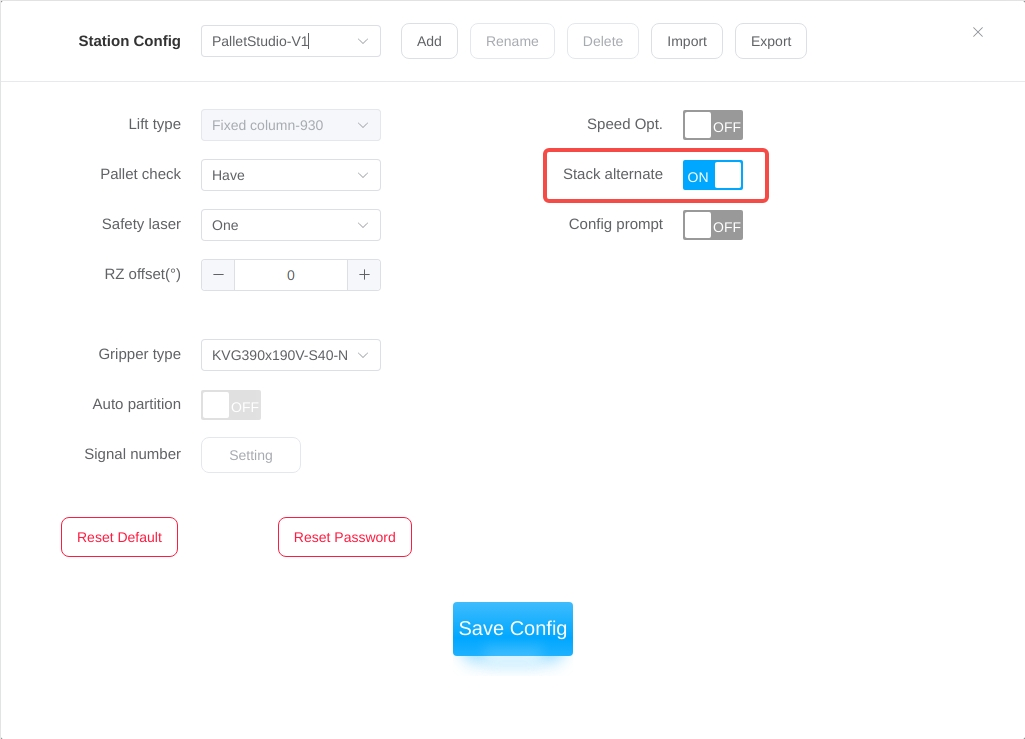
Starting Pallet Type: selects the pallet type for the starting layer;

Prerequisites: The Workstation Configuration page provides the option to select whether or not to alternate pallet types between layers;
If you select No and the starting pallet type is A, then each layer is palletized with pallet type A. If the starting pallet
type is B, then each layer is palletized with pallet type B;
If you select Yes, and the starting stack type is A, then the current layer layout is A, B, A, B … If you select Yes, and
the starting pallet type is B, then the current layer layout is B, A, B, A … ;
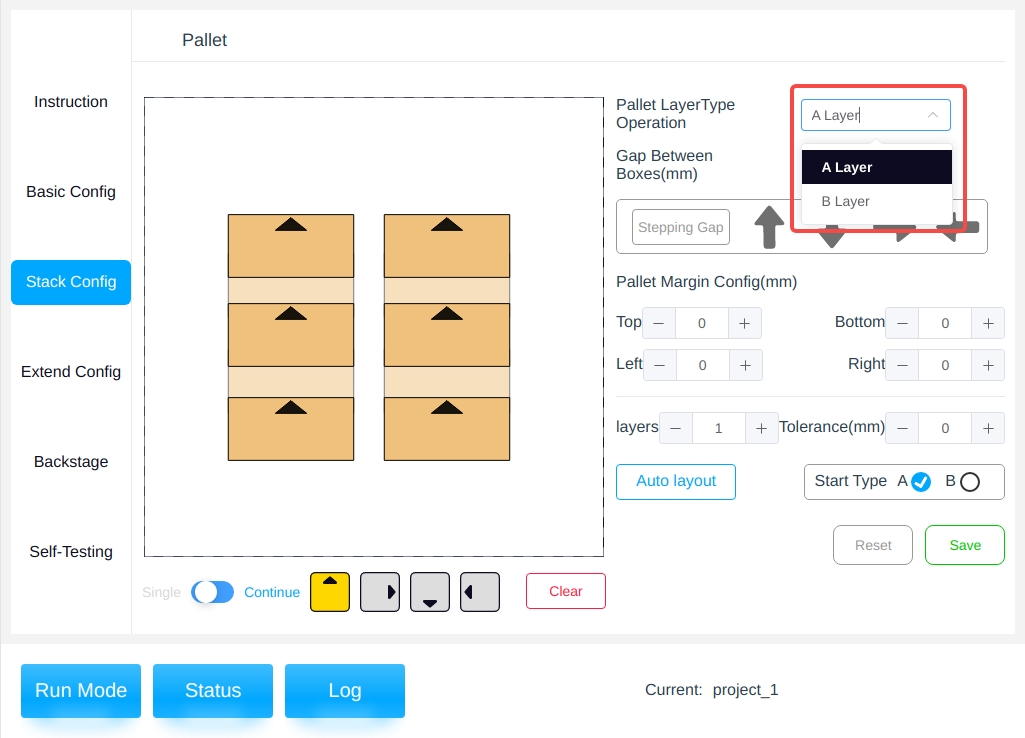
** Palletizing layer Operation**: A and B layers can be switched for pallet configuration operation;
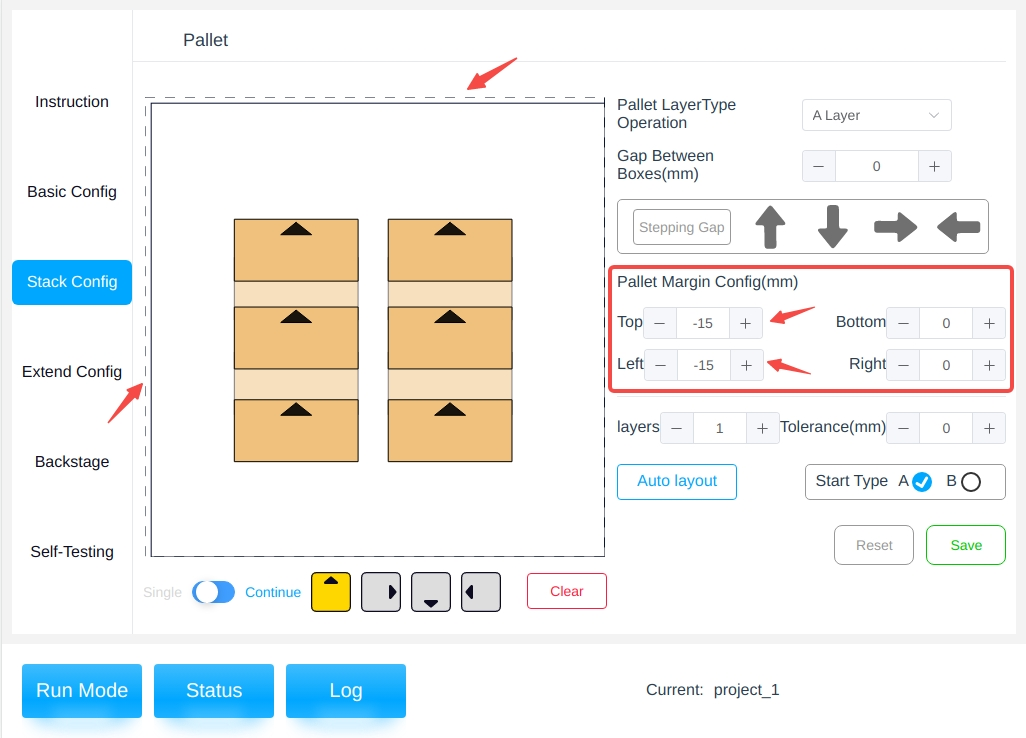
Pallet Margin Setting: the reference boundary distance between the box and the outer edge of the pallet board (mm), positive values are for the boundary inward contraction, negative values are for the boundary outward expansion; the pallet board is configured as a solid line, and the margin reference line is a dotted line;
Operation Area#
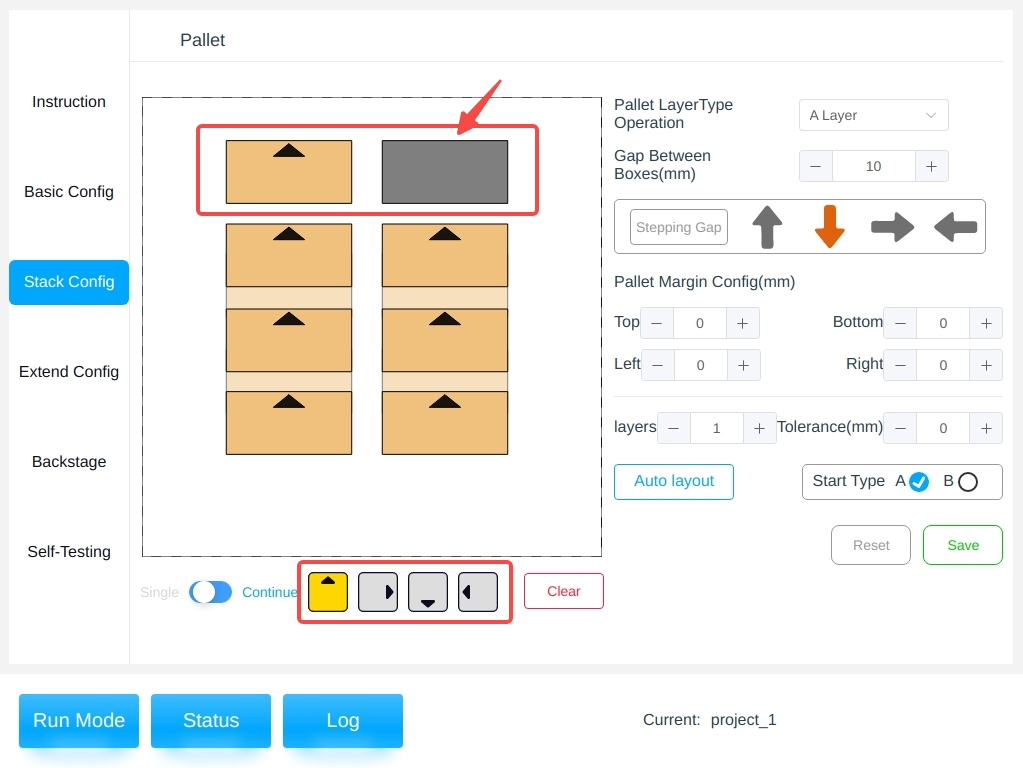
On the left side is the visualization area of the pallet, and it is also possible to manipulate the boxes, such as placing, selecting, rotating, deleting, and adjusting the gaps;
Placement : The boxes can be placed manually. Among the icons at the bottom left side, “Single/Continuous” determines whether the boxes are placed continuously on the layer or not, and the four gray icons with arrows represent the four different front facing box types;
Selected (Radio): Click on one of the lined up boxes to drag, rotate, delete, check, and so on;
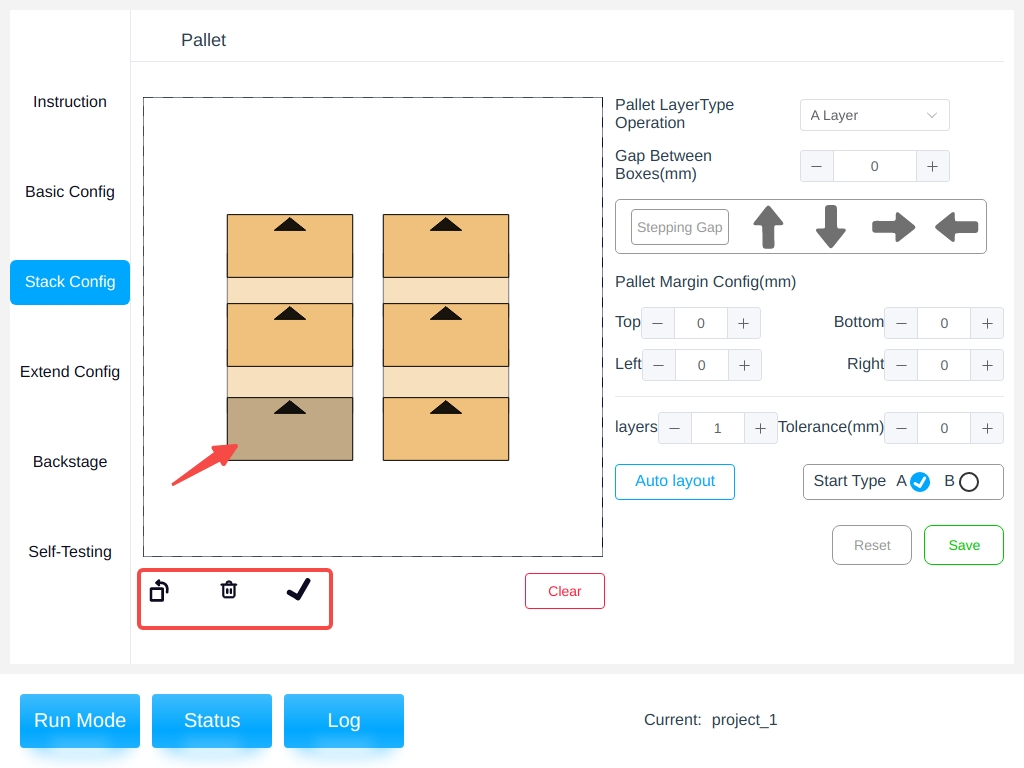
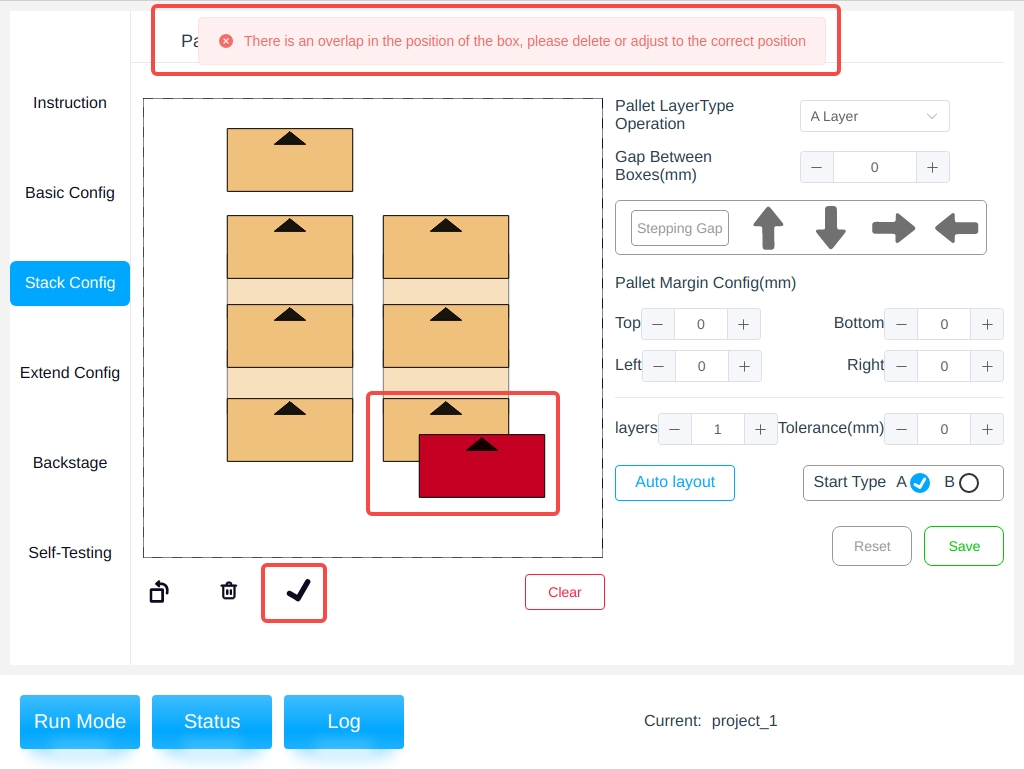
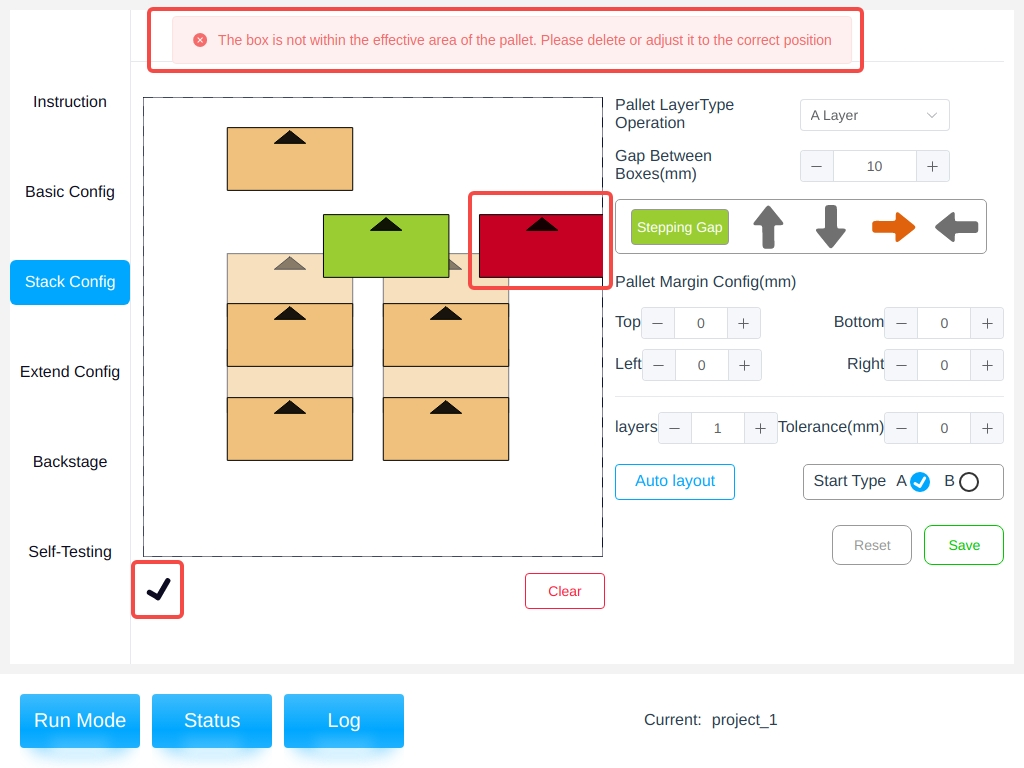
After the operation is completed, click the “right number” button, the box will be detected whether the overlap, such as overlap will be prompted;
Adjust the Spacing (Multi-select): Click on the “Step Adjust Spacing” button, the button turns from white to green, that is, to open the multi-select mode, enter the gap between the boxes, select the box you want to adjust, click on the up and down arrow buttons can be moved horizontally or vertically in the selected box;
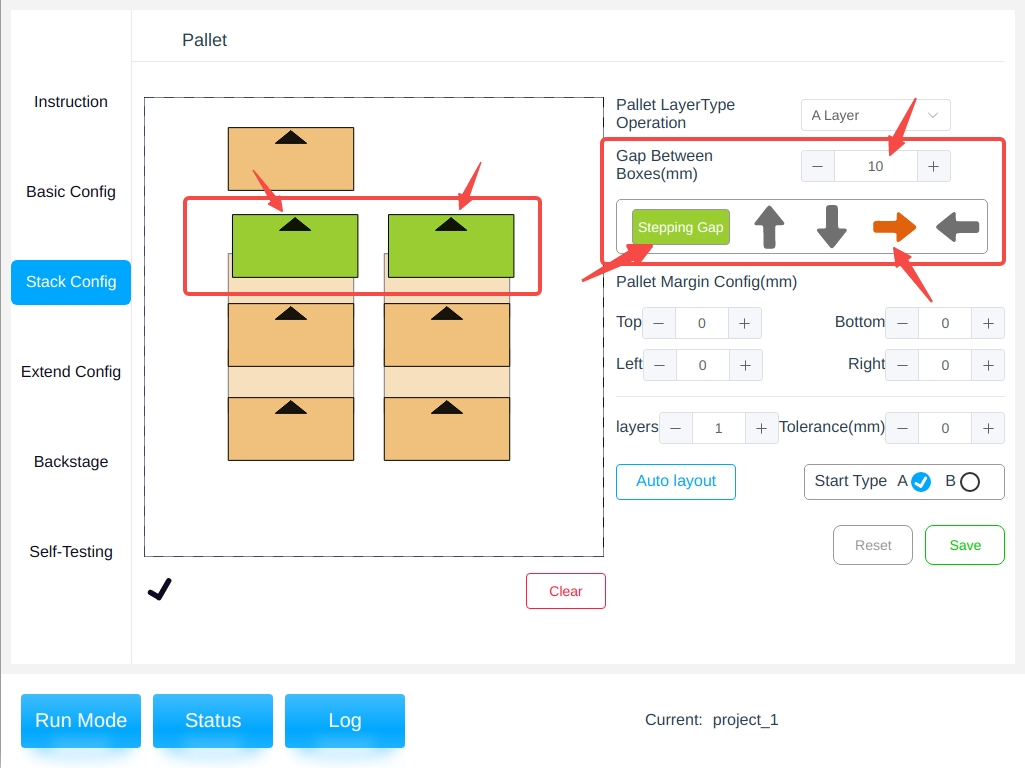
After the operation is completed, click on the “Number” button, the box will be overlapped and whether the boundary of the detection, such as overlap or exceed the tray boundary will be prompted; operation is completed without exception, you can click on the “Step to Adjust the Spacing” button to exit the multi-select mode.
Empty Pallet : The “Empty Pallet” button at the bottom right of the left side area, click on it to empty all the boxes placed in the current pallet and start palletizing again.
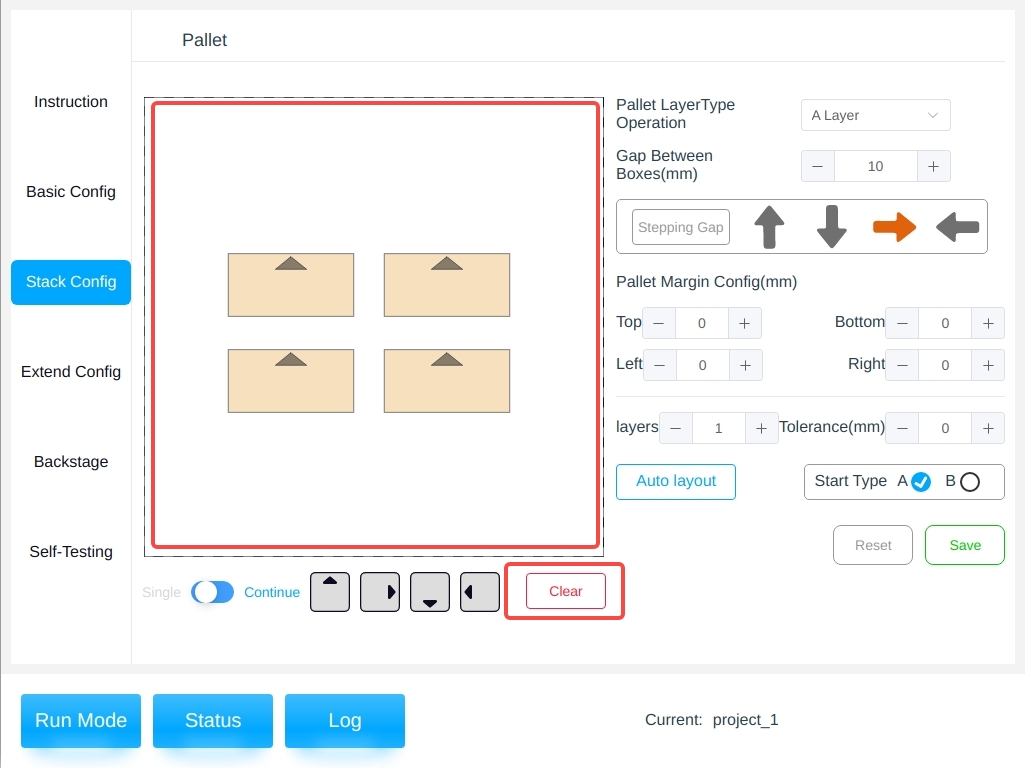
NOTE: When you do the clear stack operation for the current layer ( pallet A ), the canvas area shows the lower layer, pallet B, and the color of the lower layer is light yellow;
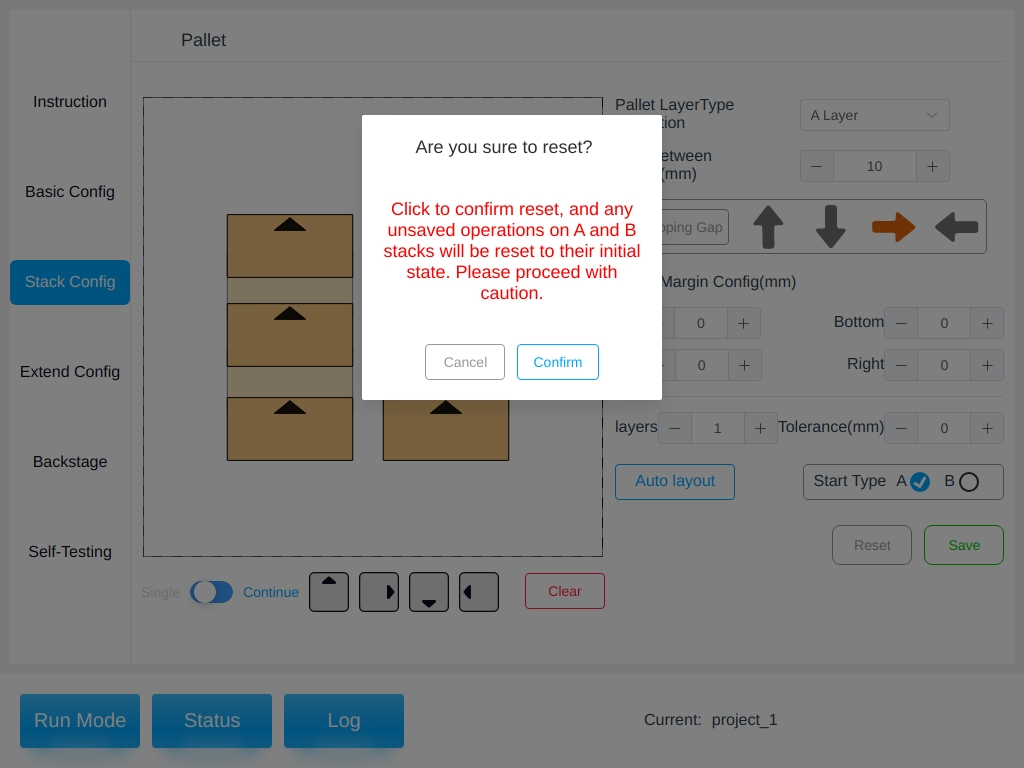
Save : After setting all the parameters of A and B stack layers, you can click the Save button. The confirmed operation part should be saved in time during the operation.
Reset : Provides reset function, i.e., to return to the initial state or the state after the last save, and the A and B pallets will be reset at the same time, so it should be operated carefully.