


Extended Configuration#
Conveyor Line Point Configuration#
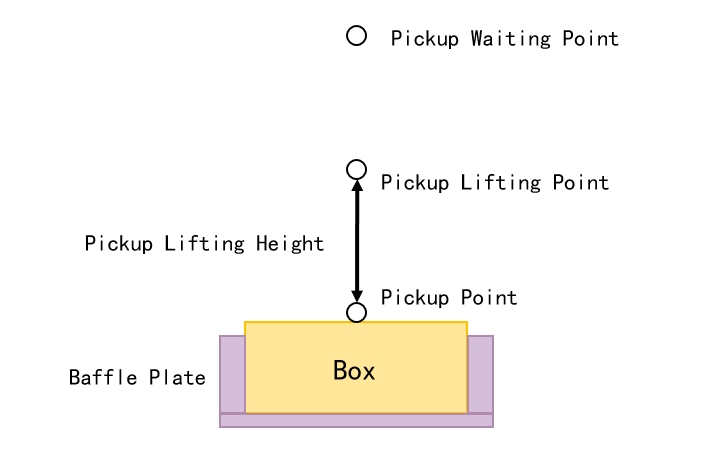
Conveyor line point configuration involves pickup transition point 1/2 (optional), pickup waiting point, pickup point and pickup lifting height, pickup waiting point, pickup lifting point and pickup point of the relationship between the diagram shown below. Among them, the pickup lifting point is used to set a transition point above the pickup point that can avoid the interference of the baffle plate on the box body.
Pickup Transition Point Configuration#
In the process of picking up materials, the picking up transition point is the robot end to pick up the box from the initial position to the picking up waiting point in the process of the need to avoid obstacles so as to set up the attitude position points. This point can be decided according to the actual situation whether to configure, that is, the fetching completion trajectory flow is as follows:
Pickup transition point 1 (optional) → Pickup transition point 2 (optional) → Pickup waiting point → Pickup point → Pickup lifting point
Note
Tips: Be sure to teach the pickup transition point while the elevator is zeroed!
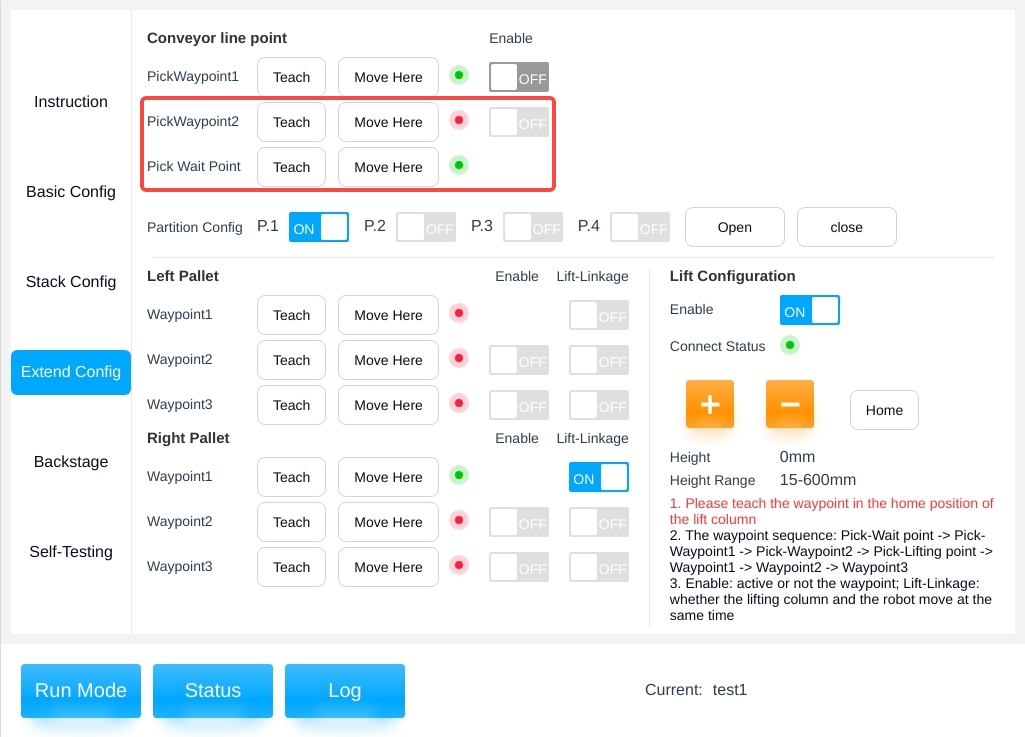
Select “Conveyor Line Position” → “Pickup Transition Point 1/2” → “Teach” to enter the pickup transition point teaching pop-up window, in the pop-up window for teaching, teaching process refer to the previous section. The process of teaching will be referred to the previous article, and will not be repeated here. As shown in the figure below, select “ON/OF” to decide whether to enable the reclaim transition point or not, “Enable” means whether to activate the reclaim transition point or not, if not, it will not pass through this point.
Note
Tips: The enable switch is disabled when the pickup transition point is not taught!
Pickup Waiting Point Configuration#
The pickup waiting point is generally located above the pickup lift point, this point is used to wait for the box in place signal to be triggered.
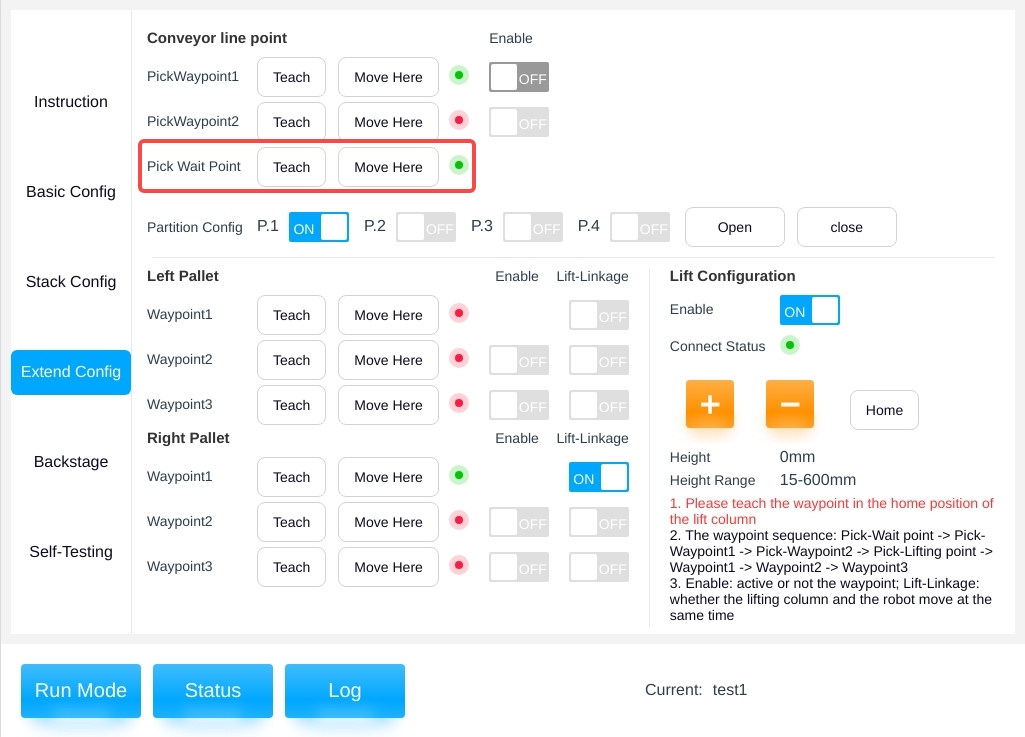
The system has set this point by default, and the user can customize and modify it. Select “Waiting point for picking materials” → “Teaching” to enter the teaching pop-up window for adjusting the waiting point for picking materials at the end of the robot.In the pop-up window for teaching, teaching process reference to the previous section, not repeated here, the following chart.
Pickup point, pickup lift height configuration#
The pickup point configuration is configured in the Basic Configuration page, please refer to the previous description for the teaching procedure, which will not be repeated here.The pickup lift height configuration is set in the background parameter page, please refer to the following explanation for details.
Suction cup partition enable configuration#
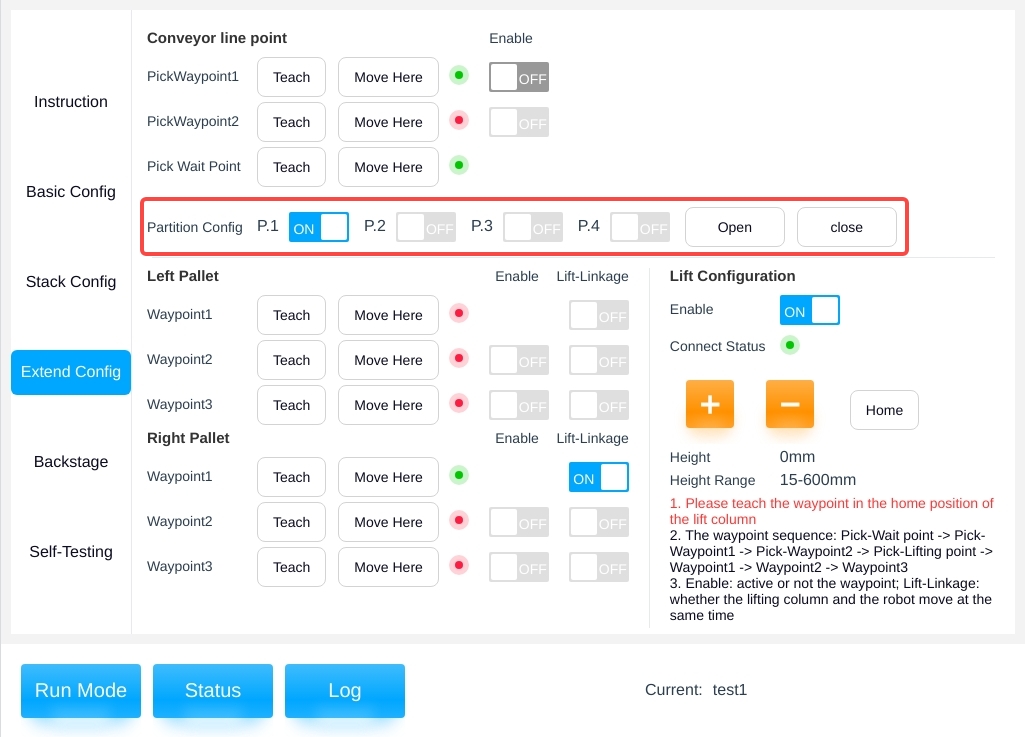
When a non-system preset station configuration is selected, the suction cup automatic partition calculation parameter is not enabled, the user can manually select the enabled suction cup partitions, and the number of partitions that can be enabled is equal to the number of vacuum signals set. If Partition 1 and Partition 3 are enabled as shown below, Partition 1 and Partition 3 of the suction cups will be opened when the material is picked up and the suction cups can be operated manually by clicking on “Open” or “Close”.
Palletizing Transition Point Configuration#
In palletizing, the transition point is a gesture position point that needs to avoid obstacles and thus be set artificially during the process from the pickup lifting point to the subsequent placing point after the end of the robot picks up the box, i.e., the trajectory flow is as follows:
Pickup lifting point → transition point 1 (optional) → transition point 2 (optional) → transition point 3 (optional) → subsequent placement point (automatically generated)
Note
Tips: Be sure to teach the transition point at the elevator zero state!
Select “Left/Right Palletizing” → “Transition Point 1/2/3” → “Teach” to enter the palletizing transition point teaching pop-up window, and then teach in the pop-up window, refer to the previous section for the teaching process. The process of teaching will be referred to the previous section and will not be repeated here. As shown in the figure below, select “ON/OF” to decide the enabling and lifting linkage of the transition point. Among them, “Enable” means whether to activate the transition point or not, if not, it will not pass through this point; The “Lift Linkage” indicates whether the robot end will be lifted automatically with the elevator when it passes through this point.
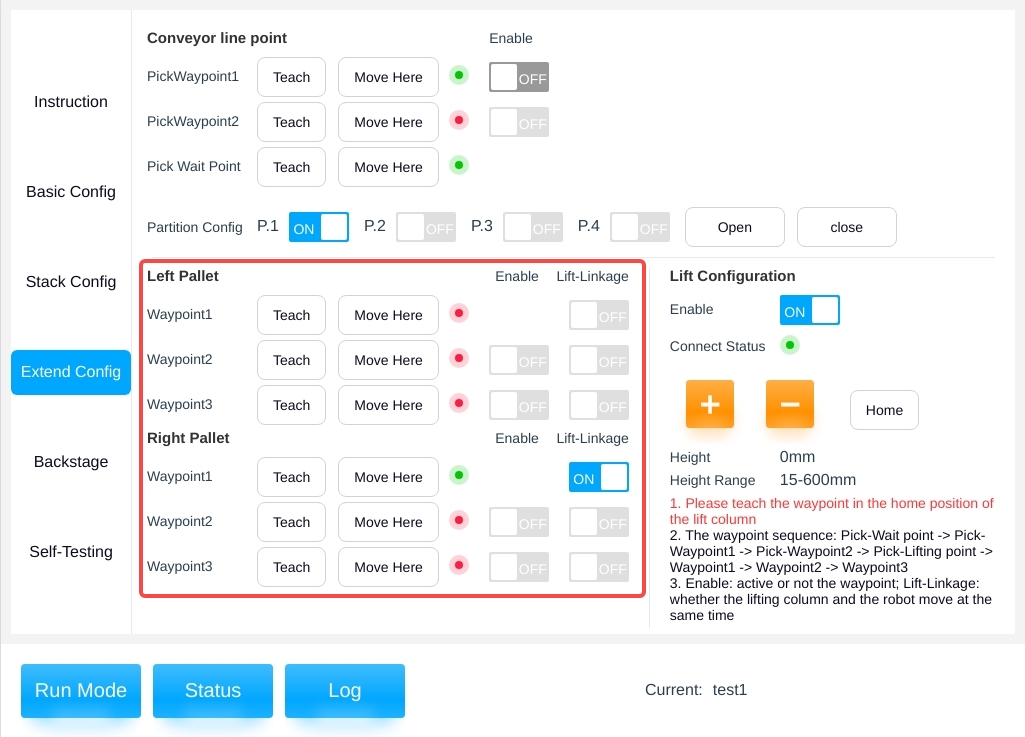
Note
- Tips:
The enable switch and lift linkage switch are disabled when the transition point is not taught!
Transition point 1 is taught by default and the enable switch is enabled!
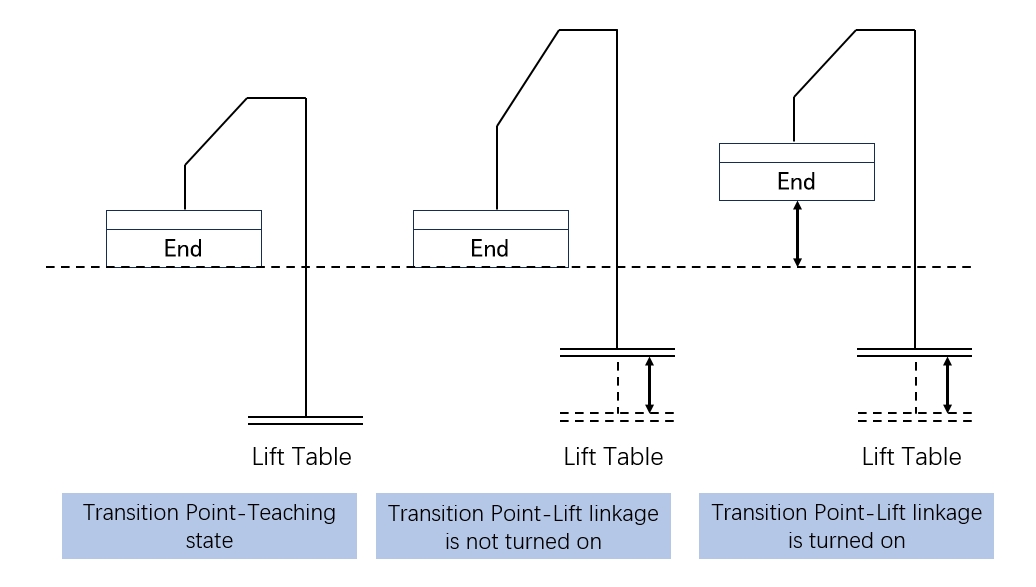
The diagram of “Lift Linkage” is shown in the following figure. The left sub-diagram shows the teaching state of the machine at the transition point, if the lift linkage is not turned on, the end of the robot will not rise when the lift table rises (i.e., as shown in the middle sub-diagram), and if it is turned on, the end of the robot will rise when the lift table rises (i.e., as shown in the right sub-diagram).
Lifting Column Configuration#
This displays the current enabled status, connection status, current height and travel range of the lifting column and can be manually adjusted to change the current height of the lifting column.“Press and hold to return to zero” to return the lift column to zero position , as shown below.
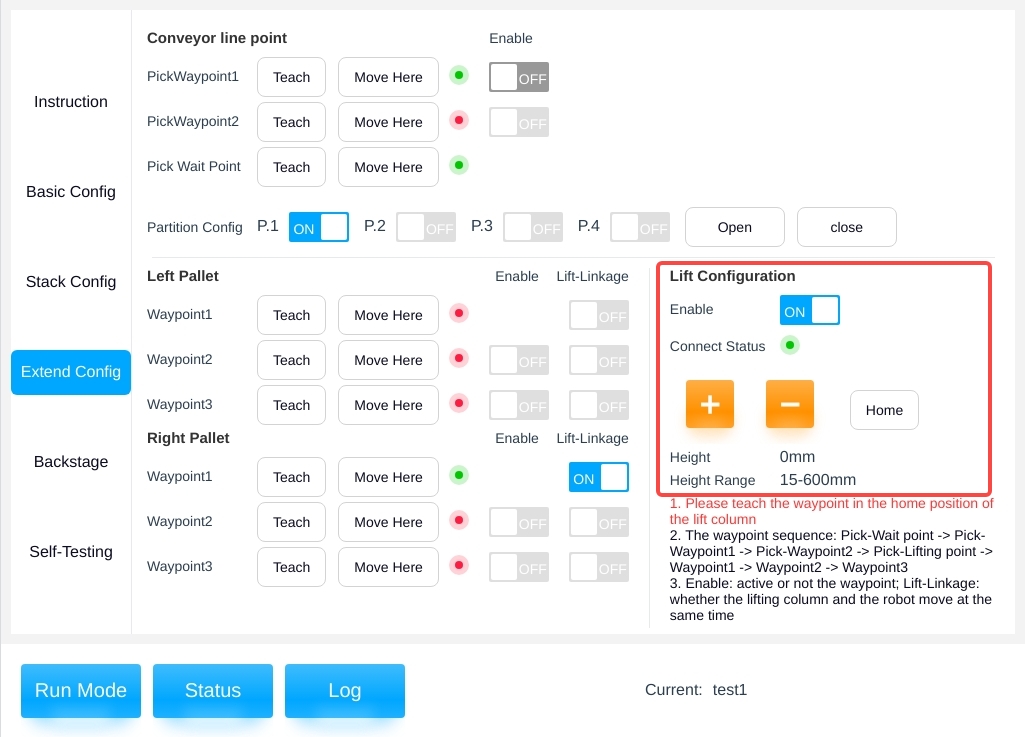
Note
Tips: When the lift column is not enabled, the palletizing transition point enable and lift linkage switches are disabled!