Overview Page#
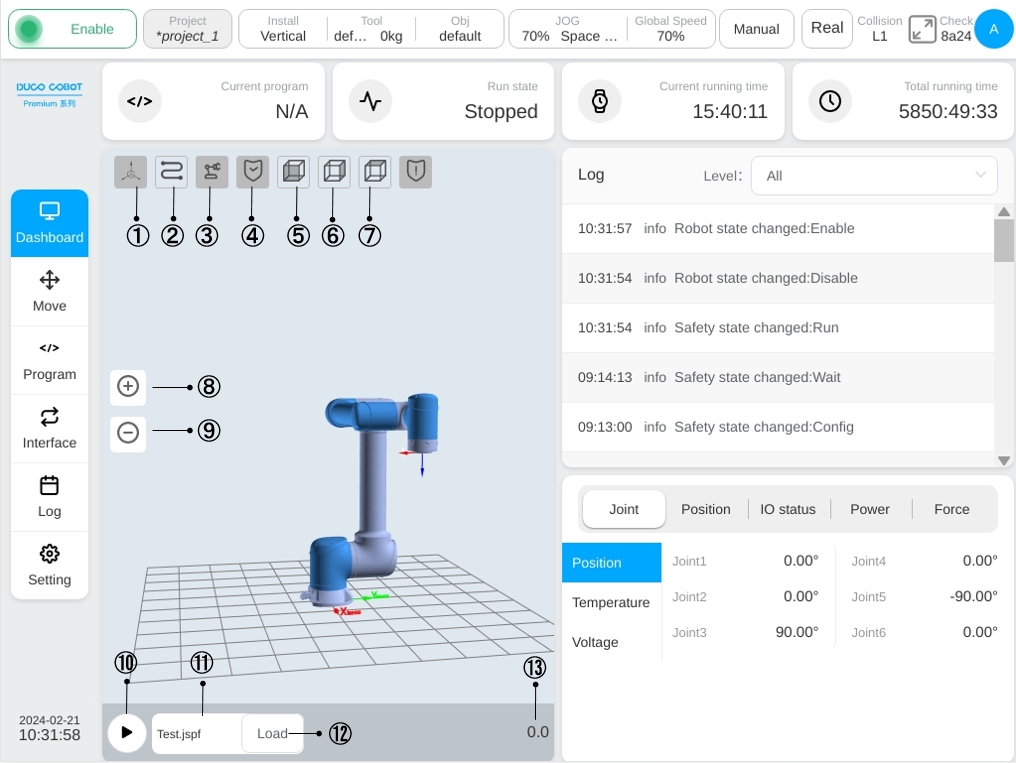
Clicking the ‘Overview’ button in the navigation bar will take the user to the overview page as shown in the figure. At the top of the page content area, it displays: current running program, program running status, current running time and whole machine running time. On the left side of the page, ① displays the 3D simulation model; on the top right side, ② displays the log information, and the log can be viewed by selecting five different levels: All, Fatal, Error, Warning, and Information through the drop-down box; on the bottom right side, ③ displays the information about the joints of the robot (position/temperature/voltage), the spatial position (in the base coordinate system), the status of the IOs, the information about the power supply (in the control cabinet), and the force information.

3D simulation model area as shown in the figure, the upper left ① - ⑦ icons indicate whether to display: workpiece coordinate system and tool coordinate system, end trajectory, robot 3D simulation model, safety zone, front view, right view and top view. Icons ⑧ and ⑨ are buttons to operate the zoom-in and zoom-out of the 3D model, respectively. Icons ⑩ - ⑬ are the program run button, the currently running program display box, the load program button, and the program run time display, respectively.

Click the ‘Load’ button, the program list interface will pop up, as shown in the figure. The program list lists all folders (e.g. Test_1) and program files with the.jspf extension (e.g. ee.jspf). There are three buttons at the bottom of the screen: Return to the upper layer, Cancel, and Select.
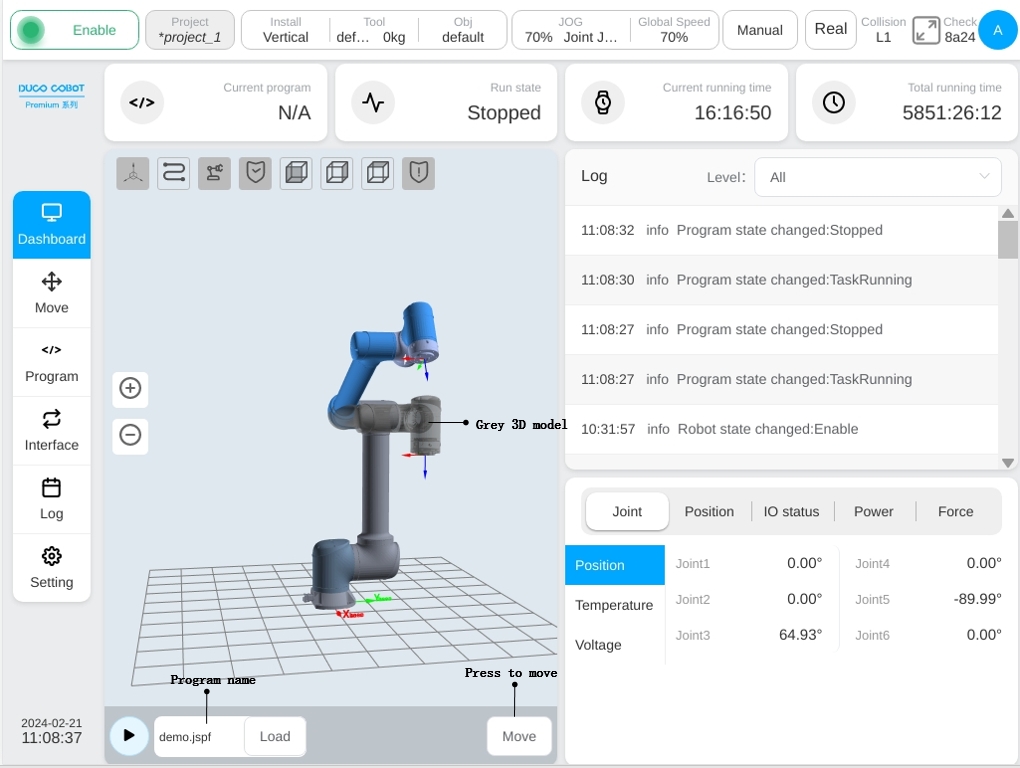
Select the program file that needs to be loaded and run, click the ‘Select’ button on the interface, the program list interface will automatically disappear, while the icon display will show the file name of the selected program file or the file name with ‘…/’. The file name of the selected program file or the file name with ‘…/’ (there are nested folders, e.g., …/4560.jspf) will be displayed at the icon. If the program starts with a “Start” function block, clicking the ‘Run’ button with the ‘Hold to Move’ button would show the gray perspective 3D model (collectively referred to as the gray 3D model) will appear, as shown in the figure. Pressing and holding the ‘Hold Move’ button will move the robot to the initial position set in the program, i.e., the gray perspective 3D model, during the process releasing the button will stop the movement. When the robot moves to the grayed-out 3D model, the ‘Press and Hold Move’ button disappears. At this point, click the ‘Run’ button again to run the program.