3D visualization without demonstration#
present#
3D Vision Teach-Free obtains the features of the weld seam by visually recognizing the image with the camera, recognizes the weld seam and automatically generates the welding point position and returns it to the robot, realizing Teach-Free.
camera communication link#
Camera communication is configured for connection on the Intelligent 3D Vision Teach-Free page in System Configuration.
Programming function blocks#
There are two function blocks related to 3D vision free teaching: SingleCapture, MultiCapture.
SingleCapture#
Single-step photo taking that returns weld information for the weld.

Photographic parameters
Visual template number: Select the template number in the appropriate camera system to fill in;
Imager RIO number: After creating an identification area in the imager system and creating a RIO number, fill in the corresponding RIO number;
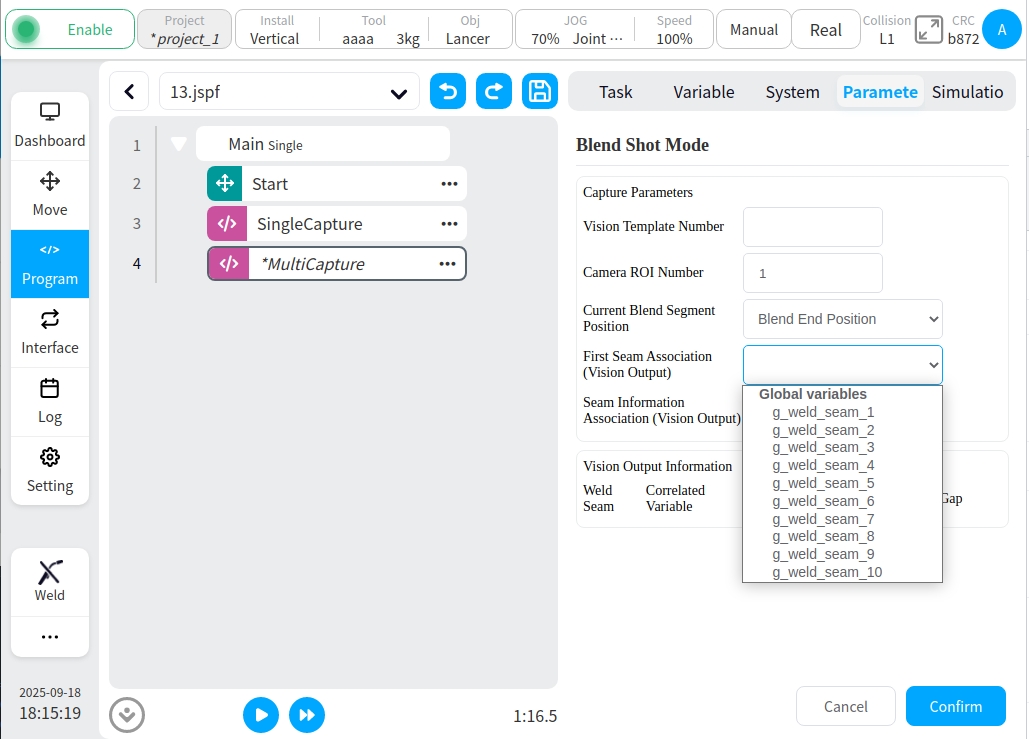
Visual output of the first weld associated: to store the weld point data returned by the camera; the first time you use it, you need to create a system variable, variable name ‘weld_seam’, type ‘pose_list’, number at least 10; when the visual output of the first weld associated with the first weld, the first weld of the current photographic block will be associated with the selection of the item, and the subsequent weld will be associated with this serial number. The subsequent welds will be associated with this serial number.
For example: the current photo block returns three welds, the first weld is associated with ‘g_weld_seam_1’, then the subsequent welds will be automatically associated with ‘g_weld_seam_2’ and ‘g_weld_seam_3’, and the subsequent welds will be automatically associated with ‘g_weld_seam_2’ and ‘g_weld_seam_3’. weld_seam_3’.

Vision output weld seam information association: Use to store the weld seam information data returned by the camera; for the first time, you need to create a system variable called ‘weld_seam_info’, type ‘pose_list’, number of at least 6; the association method is the same as above.

Visual output information
Displays visual output weld information, including weld sequence number, associated variables, number of weld spots, weld characteristics, plate thickness, and gap;

MultiCapture#
Fusion photography, image stitching and fusion by taking multiple photos, and then return the fused weld information.
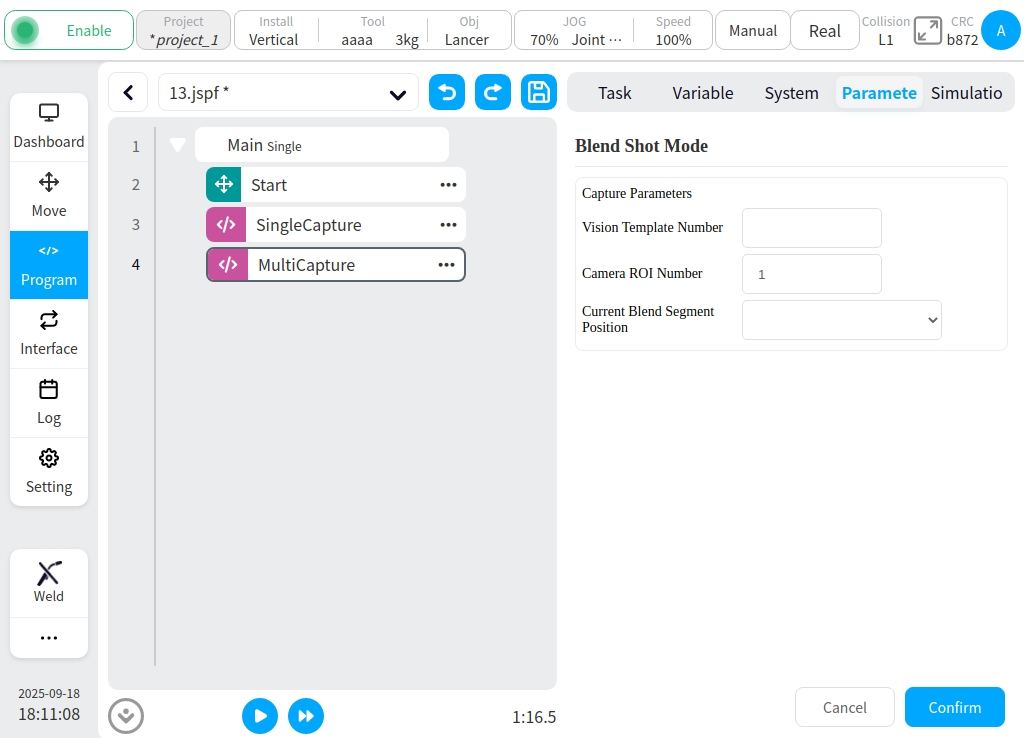
Photographic parameters
Parameters are the same as SingleCapture’s photo parameters above. The focus is on the ‘current fusion segment position’;
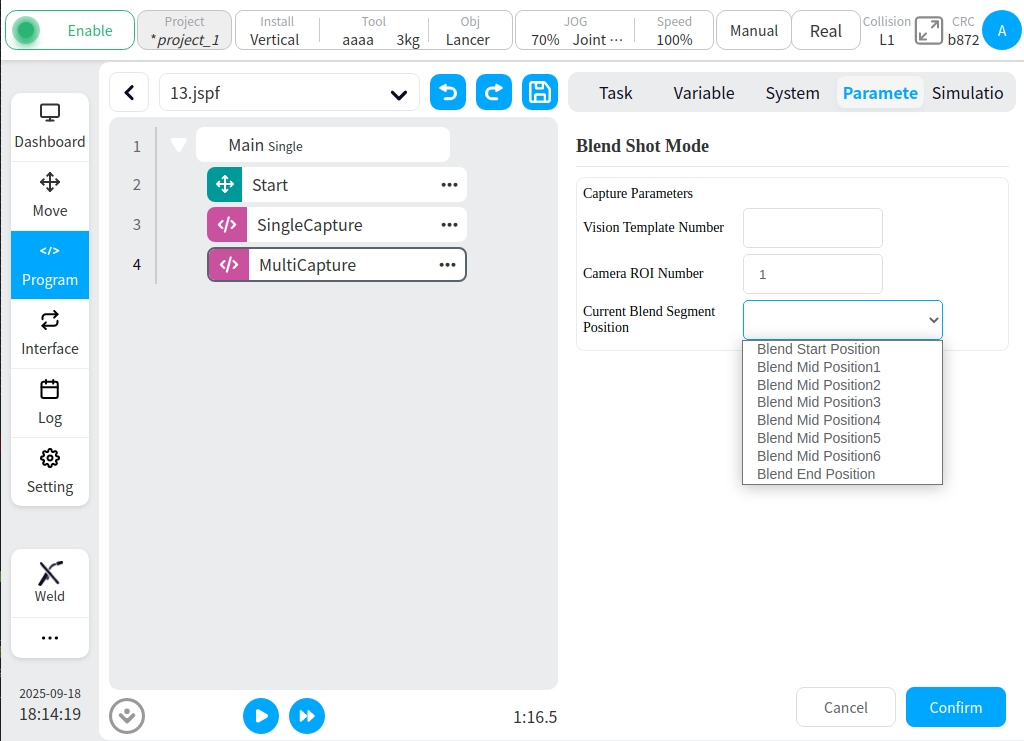
Current fusion segment position: Select the position of the current fusion block; the position selection must be made in order; the first fusion block selects ‘fusion start position’, the middle selects in the order of the serial number after the fusion middle position, and the last fusion block selects ‘fusion end position’. Fusion end position’.
When the fusion block is ‘Fusion end position’, ‘Visual output first weld association’ and ‘Visual output first weld association’ can be selected.
Visual output information Same as above.
Programming Tutorials#
SingleCapture#
A simple tutorial on single-step photo programming.
Arrive at the position of the photo point with the motion command.
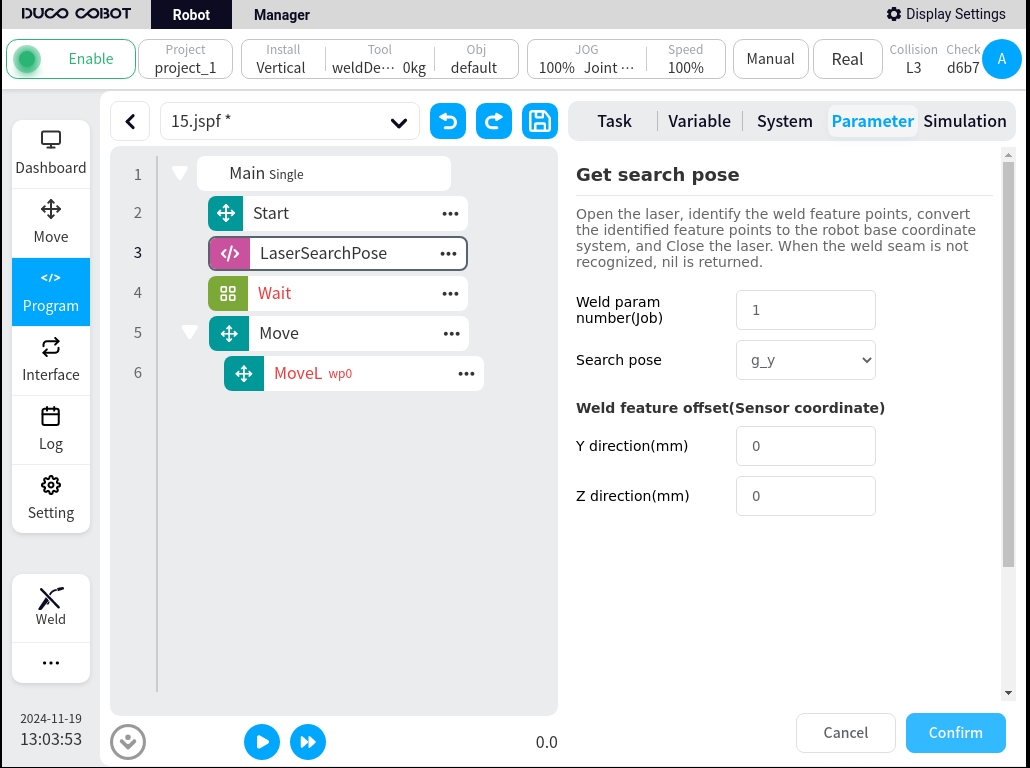
Add ‘SingleCapture’ function block and fill in the parameters. For example, the picture below:
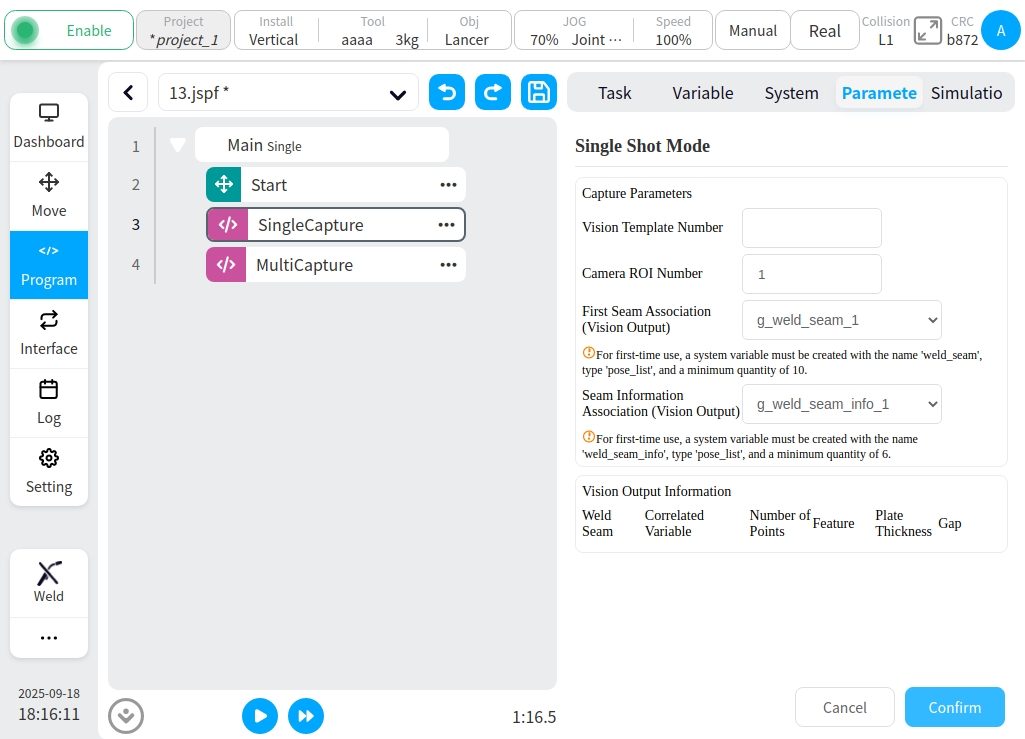
Add the welding motion instruction related block according to the photographed weld seam, the point information of the motion instruction needs to be filled in by selecting the form of variable. For example, return a weld seam as shown below:
Caution
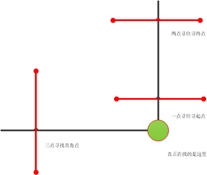
Under normal circumstances, the camera returns to a single weld for four points: the beginning of the safety point, the arc starting point, the arc closing point, the end of the safety point. If you need more than one point, you need to reset the camera system;
Starting safety point (if the photo point is suitable, you can ignore this point setting or set it as the starting safety point yourself)
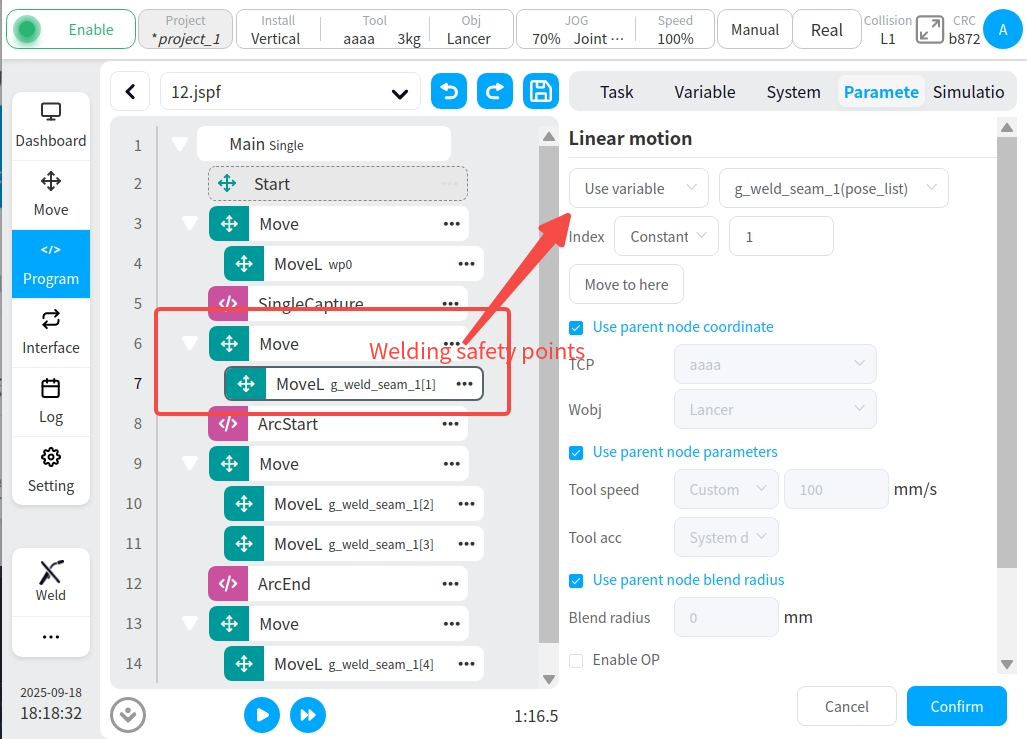
The weld point positions are simply taken in turn according to the variable index;
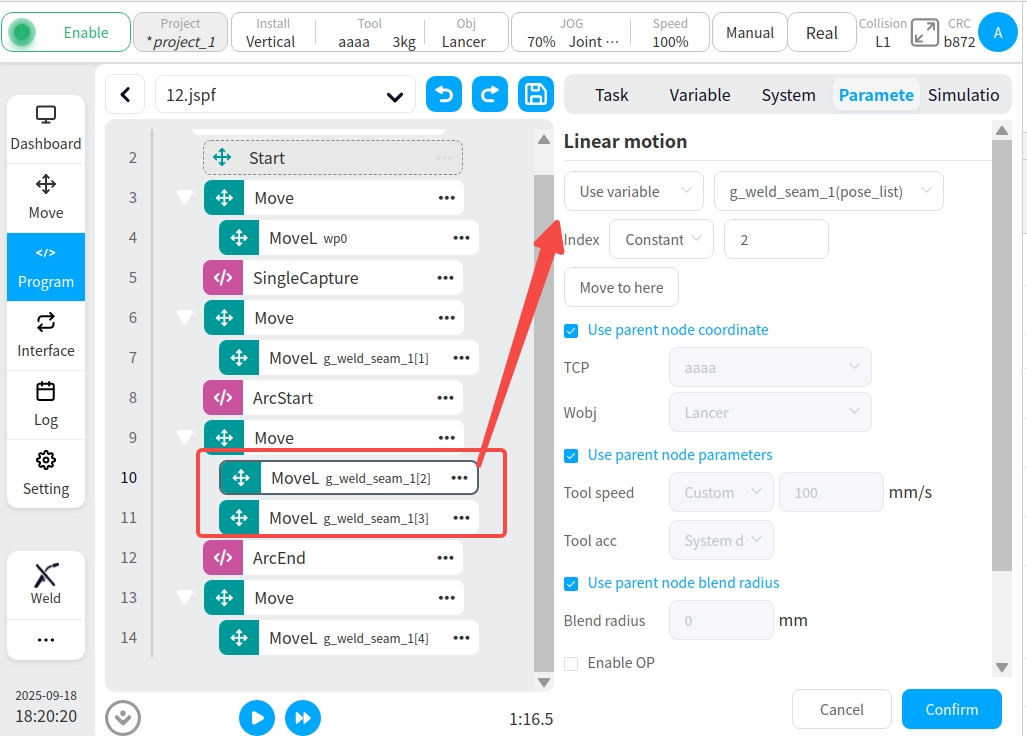
End safety point (can also be set as end safety point by your own demonstration)
This completes the single-step photo function.
MultiCapture#
A simple tutorial for the Fusion Photo Program.
Arrive at the position of the photo point with a motion command.
Add the ‘MultiCapture’ function block and fill in the parameters in turn. Example of three fusion photos, as shown below:
Fusion initiation site
Integration intermediate point 1
fusion terminator
Refer to the single-step photo tutorial for subsequent welding track point associations.
abnormal signal#
In the event of a picture taking exception and the external party wants to get the exception signal, you can create the system variable ‘captureError’ to listen for the capture.